使用C++编程,基本参考C++语法。
每一句结尾用分号,注释用//,全大写单词是特有字符,不要乱用。函数用{}套起来。
 1void setup() {
 2  // put your setup code here, to run once:
 3    // 这里的代码在开始的时候运行一次
 4    code doing something;  // 每一行代码用分号结尾
 5
 6}
 7
 8void loop() {
 9  // put your main code here, to run repeatedly:
10    // 这里的代码会循环重复运行
11
12}
C++在线学习资料
https://www.bilibili.com/video/BV1et411b73Z
Arduino语句函数库参考
http://www.taichi-maker.com/homepage/reference-index/arduino-code-reference/
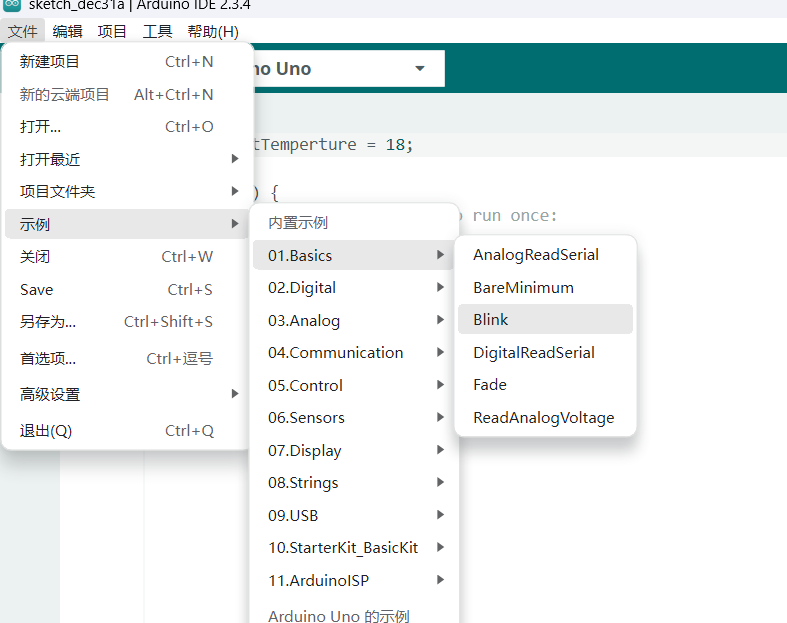
示例程序Blink
点亮LED小灯
1/*
2 Blink
3
4 Turns an LED on for one second, then off for one second, repeatedly.
5 打开LED一秒钟,然后关闭一秒钟,重复。
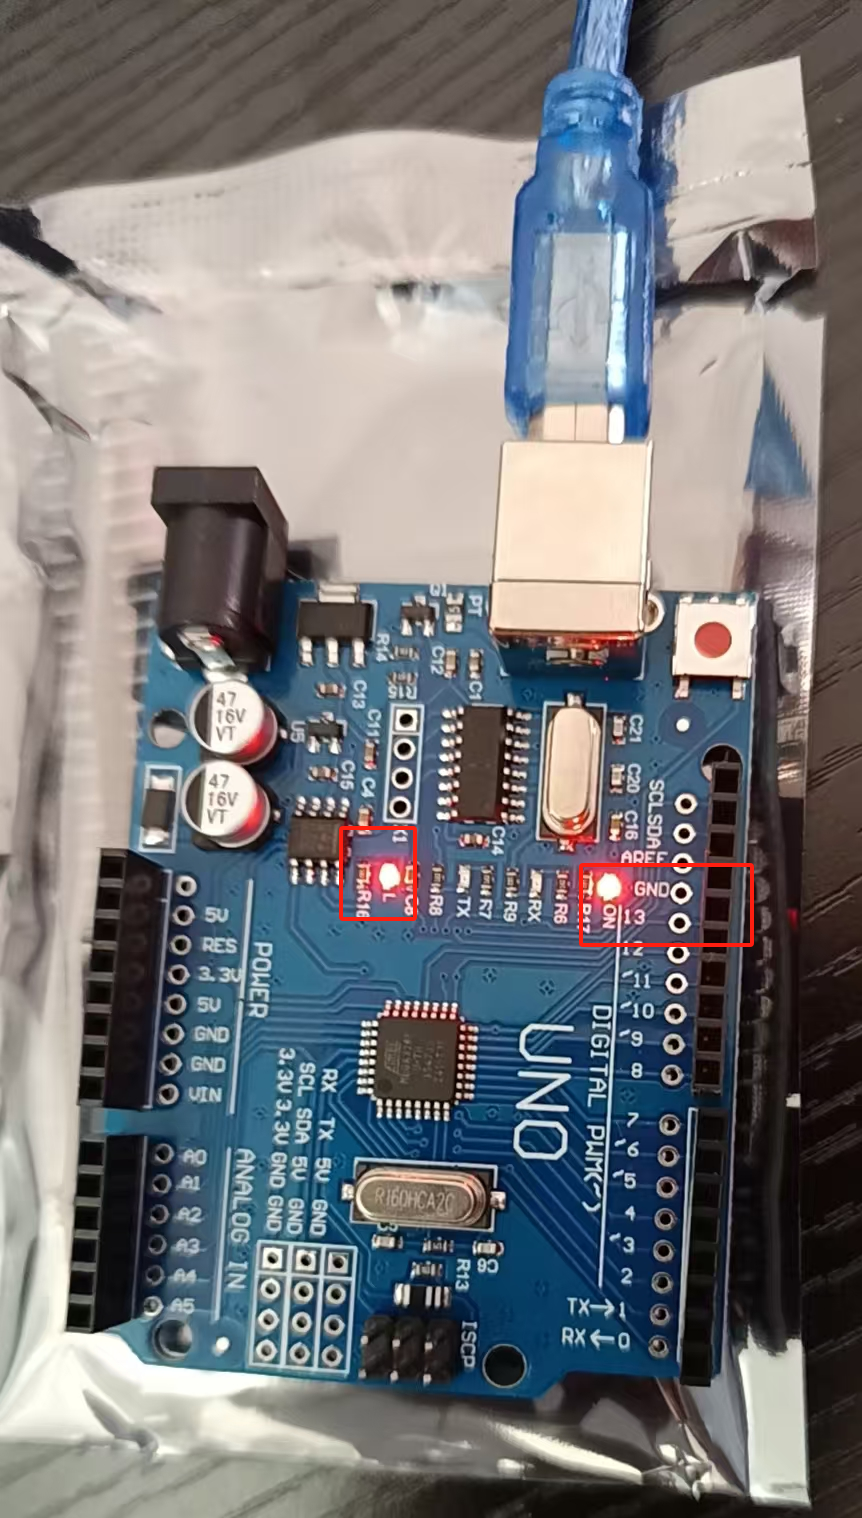
6 Most Arduinos have an on-board LED you can control. On the UNO, MEGA and ZERO
7 it is attached to digital pin 13, on MKR1000 on pin 6. LED_BUILTIN is set to
8 the correct LED pin independent of which board is used.
9 If you want to know what pin the on-board LED is connected to on your Arduino
10 model, check the Technical Specs of your board at:
11 大多数arduino都有一个可以控制的板载LED。
12 在UNO, MEGA和ZERO上,它连接到数字引脚13,在MKR1000引脚6上。
13 领导_BUILTIN设置为正确的LED引脚,与使用哪个板无关。
14 如果您想知道板上LED连接到Arduino模型上的引脚,请查看板的技术规格:
15 https://www.arduino.cc/en/Main/Products
16
17 modified 8 May 2014
18 by Scott Fitzgerald
19 modified 2 Sep 2016
20 by Arturo Guadalupi
21 modified 8 Sep 2016
22 by Colby Newman
23
24 This example code is in the public domain.
25
26 https://www.arduino.cc/en/Tutorial/BuiltInExamples/Blink
27*/
28
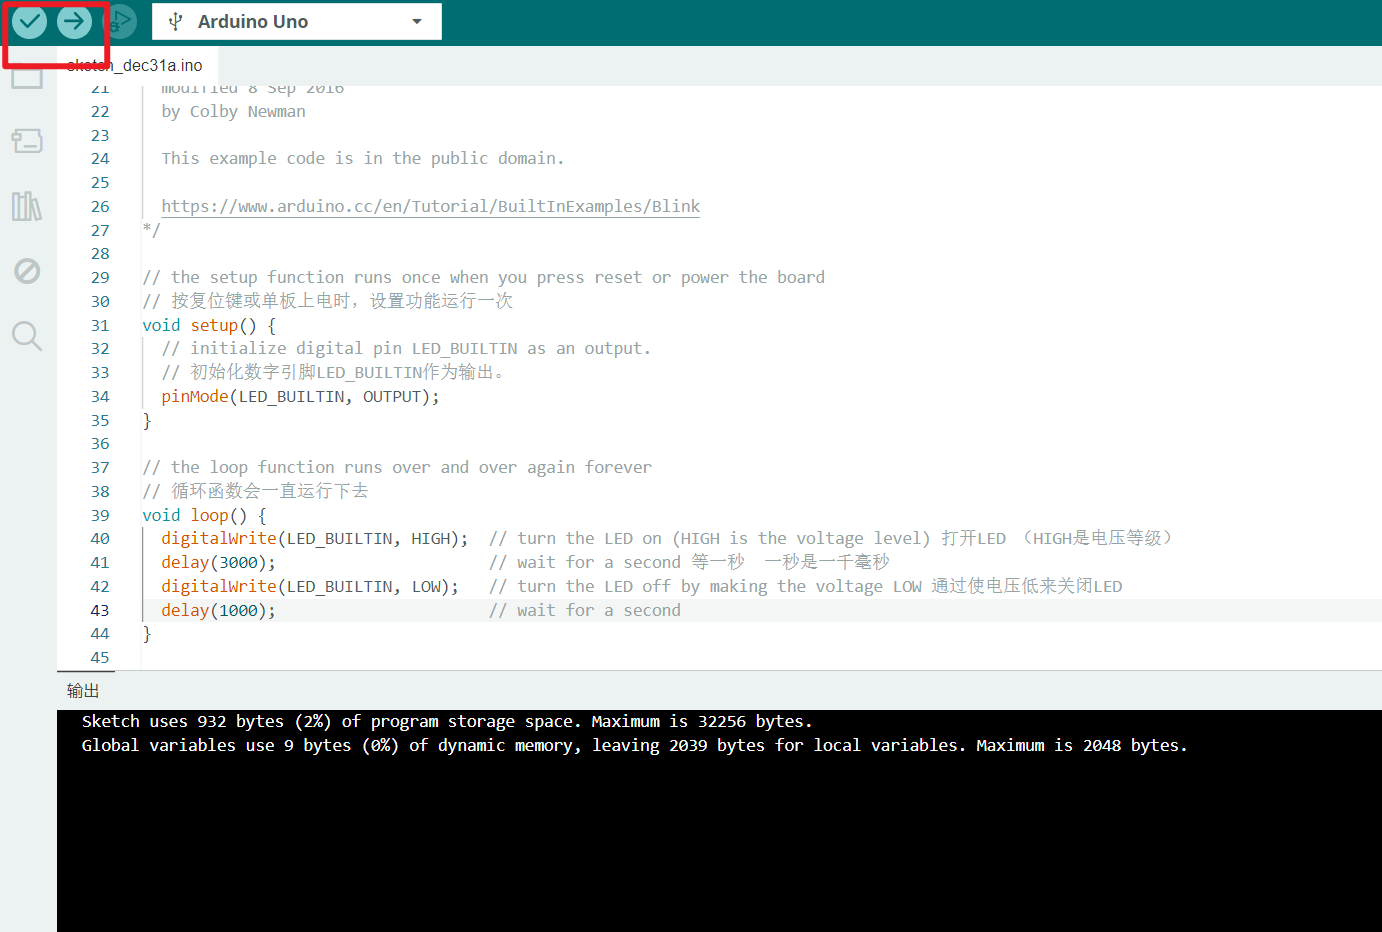
29// the setup function runs once when you press reset or power the board
30// 按复位键或单板上电时,设置功能运行一次
31void setup() {
32 // initialize digital pin LED_BUILTIN as an output.
33 // 初始化数字引脚LED_BUILTIN作为输出。
34 pinMode(LED_BUILTIN, OUTPUT);
35}
36
37// the loop function runs over and over again forever
38// 循环函数会一直运行下去
39void loop() {
40 digitalWrite(LED_BUILTIN, HIGH); // turn the LED on (HIGH is the voltage level) 打开LED (HIGH是电压等级)
41 delay(1000); // wait for a second 等一秒 一秒是一千毫秒
42 digitalWrite(LED_BUILTIN, LOW); // turn the LED off by making the voltage LOW 通过使电压低来关闭LED
43 delay(1000); // wait for a second
44}
编译好后点击上传
试着修改变量
 1int delaytime = 3000;
 2void setup() {
 3  // initialize digital pin LED_BUILTIN as an output.
 4  // 初始化数字引脚LED_BUILTIN作为输出。
 5  pinMode(LED_BUILTIN, OUTPUT);
 6}
 7
 8// the loop function runs over and over again forever
 9// 循环函数会一直运行下去
10void loop() {
11  delaytime = delaytime +1000 // 随着循环递加
12  digitalWrite(LED_BUILTIN, HIGH);  // turn the LED on (HIGH is the voltage level) 打开LED (HIGH是电压等级)
13  delay(3000);                      // wait for 3 second 等一秒  一秒是一千毫秒
14  digitalWrite(LED_BUILTIN, LOW);   // turn the LED off by making the voltage LOW 通过使电压低来关闭LED
15  delay(delaytime);                      // wait for delaytime second
16}
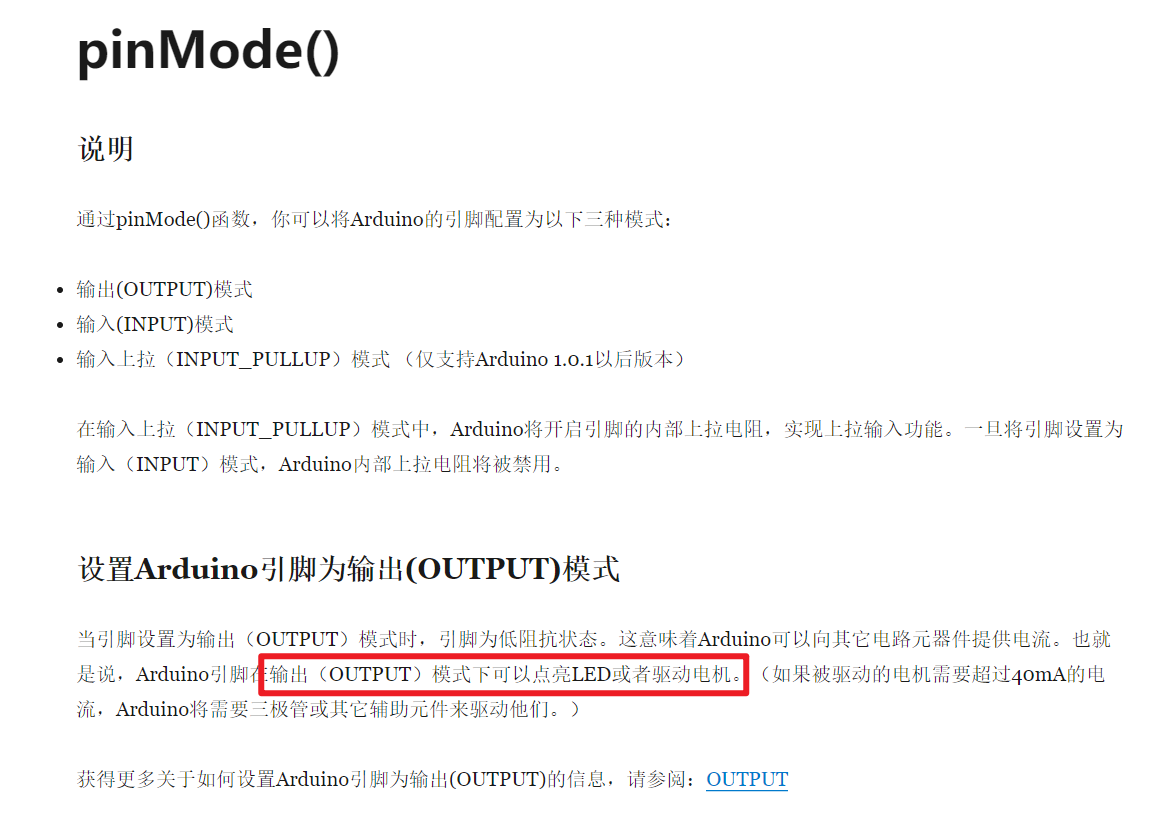
pinMode函数和digitalWrite函数
所以原代码也可写为
 1int delaytime = 100;
 2int LED_pin = 13;
 3// On the UNO, MEGA and ZERO it is attached to digital pin 13
 4// 连接到数字引脚13
 5void setup() {
 6  // initialize digital pin LED_BUILTIN as an output.
 7  // 初始化数字引脚LED_BUILTIN作为输出。
 8  pinMode(LED_pin, OUTPUT);
 9}
10
11// the loop function runs over and over again forever
12// 循环函数会一直运行下去
13void loop() {// 随着循环递加
14  digitalWrite(LED_pin, 5);  // turn the LED on (HIGH is the voltage level) 打开LED (HIGH是电压等级)
15  delay(delaytime);                      // wait for 3 second 等一秒  一秒是一千毫秒
16  digitalWrite(LED_pin, 0);   // turn the LED off by making the voltage LOW 通过使电压低来关闭LED
17  delay(delaytime);                      // wait for delaytime second
18}